-->
#### About 2D product templates
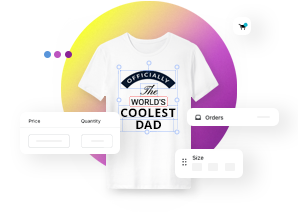
* A 2D product template is a great option when you only have an image of your product available.
* The loading time is minimal since these images are not excessively large, allowing customers to view them more quickly on their screens.
* Using 2D product templates can save time. While this may not apply to all cases, there are instances where making a single photo shoot and using 2D templates to fill the entire online store is faster than individually creating 3D models for each product.
* You can use AI to create your product images. When generating images, provide a description that aligns with our model image requirements.
#### Before we get started
Before beginning, ensure that you have your product image ready, as it will be used as a
Model image later on.
Model image is a high-quality product image in a white background. It serves as a base for adding technical details. Front, side, or top views are preferred for a realistic print appearance.
Technical requirements:
* We recommend using a size of 2000 x 2000 px for pictures. The minimum size can be up to 600 x 600 px.
* .jpg or .png file format.
[](/knowledge?classes=zoom)
Make sure you have also prepared all other product-related information, such as the title, description, real-world scale dimensions, and print size.
#### Product installation
1. Go to your
Products.
[](/knowledge?classes=zoom)
2. Click
Add new product.
[](/knowledge?classes=zoom)
3. Select
Install new customizable product from presets by clicking
Start.
[](/knowledge?classes=zoom)
4. Select
Start from blank.
[](/knowledge?classes=zoom)
5. Enter
Product title.
6. Include a brief
Description containing key information such as the product's material, size, and printing details.
7. Add
Price.
8.
Set status: it can be either Active or Draft.
9.
Save the changes.
**NOTE:** The image will be added later.
[](/knowledge?classes=zoom)
10. Congratulations! A new product has been added. Let's proceed by adding more details. Click on
Edit customization options to continue.
[](/knowledge?classes=zoom)
#### Customization options
1. First thing to do - upload your product image. To do so, click
Change in the Model Image section, then
Select file.
2. Afterward, scroll down and
Save the changes.
[](/knowledge?classes=zoom)
3. The image has been updated. Now, click on
Open Print Area Editor.
[](/knowledge?classes=zoom)
4. For
Ruler Length, input the product's real-world scale dimensions in centimeters.
5. Align the arrows to touch the sides of the product by clicking on them and scrolling to the appropriate positions.
6. Click
Print Area.
[](/knowledge?classes=zoom)
7. Define the print size by either entering numbers or adjusting the size using the blue squares.
8. To prevent accidental changes, lock the print area by selecting
Click to lock print area.
9. Click
X.
[](/knowledge?classes=zoom)
11.
Save the changes.
[](/knowledge?classes=zoom)
#### Design templates
To enhance the presentation of your product, assign
Design templates to showcase possible print examples.
Design templates is a predefined mockup of texts and visuals that help customers to start the customization quickly.
Learn how to prepare design templates
here.
[](/knowledge?classes=zoom)
After creating
Design templates, you can assign them to your product.
1. Enter
Design templates titles into the
Assign Templates window and select them to add.
Save your changes.
[](/knowledge?classes=zoom)
#### Second print area
If you wish to have a product printed on both sides, you'll need to create a second print area. Follow these steps to achieve it.
1. Click
More print areas.
[](/knowledge?classes=zoom)
2. Click
Add new print area.
[](/knowledge?classes=zoom)
3. Enter a
Title. It is for internal use only, so feel free to name it as you prefer.
4. For the
Model Image, upload the same image you used for the first print area, or another side's image depending on where you want your print to be.
5.
Save the changes.
[](/knowledge?classes=zoom)
6. Click on
Open Print Area Editor and repeat the same steps as you did for the first print area.
[](/knowledge?classes=zoom)
7. Assign a
Design Template. For the second print area, you can only select one
Design Template.
8.
Save the changes.
[](/knowledge?classes=zoom)
#### Shopify options
1. If you wish to update information about your product, navigate to your Shopify store's
Products section, then
open your Product and make the desired changes:
* You can modify the title or description
* Add more pictures featuring final product examples
* Adjust the price as needed
2. To preview the product on the front page, click on
Preview >
Customize product.
[](/knowledge?classes=zoom)
[](/knowledge?classes=zoom)
#### WooCommerce options
After creating a product template in Smart Customizer, you'll need to link it to your product in WooCommerce. Ensure that you've already created the product beforehand.
[](/knowledge?classes=zoom)
1. Now, in your product, in the
Link to Product field choose your WooCommerce product you want to link with.
2. Scroll down to
Save the changes.
[](/knowledge?classes=zoom)
3. Once the products are linked, by clicking on
Edit in Woo, you can edit all necessary product information in your WooCommerce admin. By clicking
View, you can preview and
Customize product.
[](/knowledge?classes=zoom)
[](/knowledge?classes=zoom)
#### Tips & Tricks
If you want to add additional layers that visibly enrich a product or are important for technical printing requirements, please refer to this
knowledge base.
---
* [About 2D product templates](#about)
* [Before we get started](#before-start)
* [Product installation](#installation)
* [Customization options](#options)
* [Design templates](#design-templates)
* [Second print area](#second-print)
* [Shopify options](#shopify)
* [WooCommerce options ](#woocommerce)
* [Tips and Tricks](#tips-and-tricks)
---
#### Related
Setting up design templates for your product →
Adding a customization to a Shopify product →

