Creating product variants in Shopify
This article refers to Smart Customizer Web to Print App Version 2.0
Creating product variants
- By default, you can add options like color, size, and other custom choices in the Smart Customizer product settings.
- However, in some cases, you may need to use Shopify product variations instead of SC product options. For example:
- If you need to track inventory levels in Shopify.
- If the same product has different 3D models (e.g., square and rectangular pillows), requiring two SC product templates but a single Shopify product.
- If 2D product templates have visually different sizes and details (e.g., phone cases of different sizes), requiring different SC product templates but a single Shopify product.
- If you need to assign different SC product variations to Shopify product variants or different Shopify products for any reason.
Adding product variants in your Shopify store
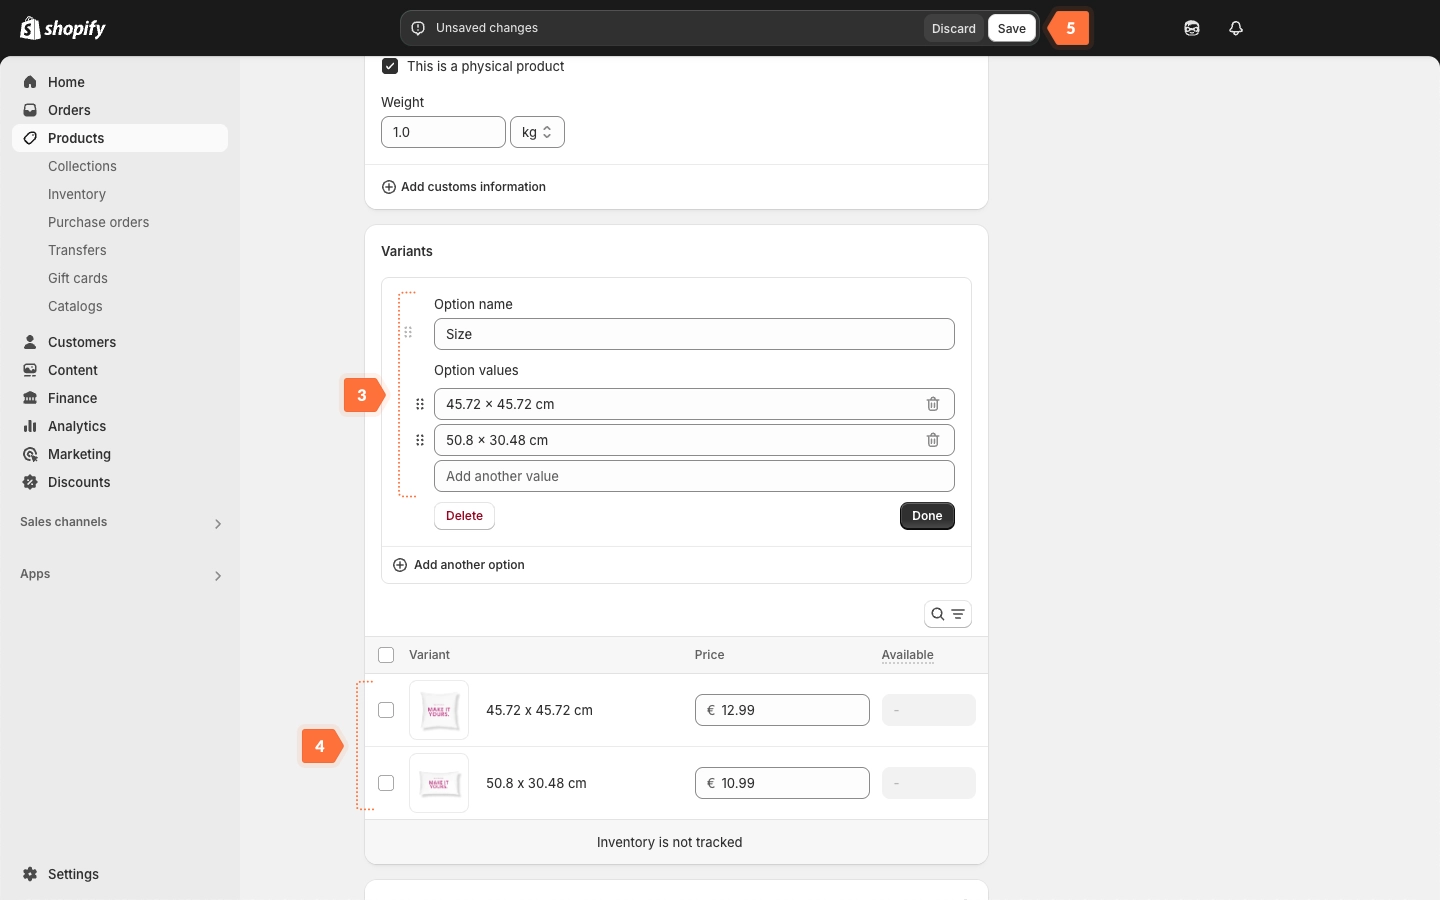
- Open your customizable product in Shopify.
- Scroll down to the bottom of the page to find Variants section. Click on the Add options like size or color.
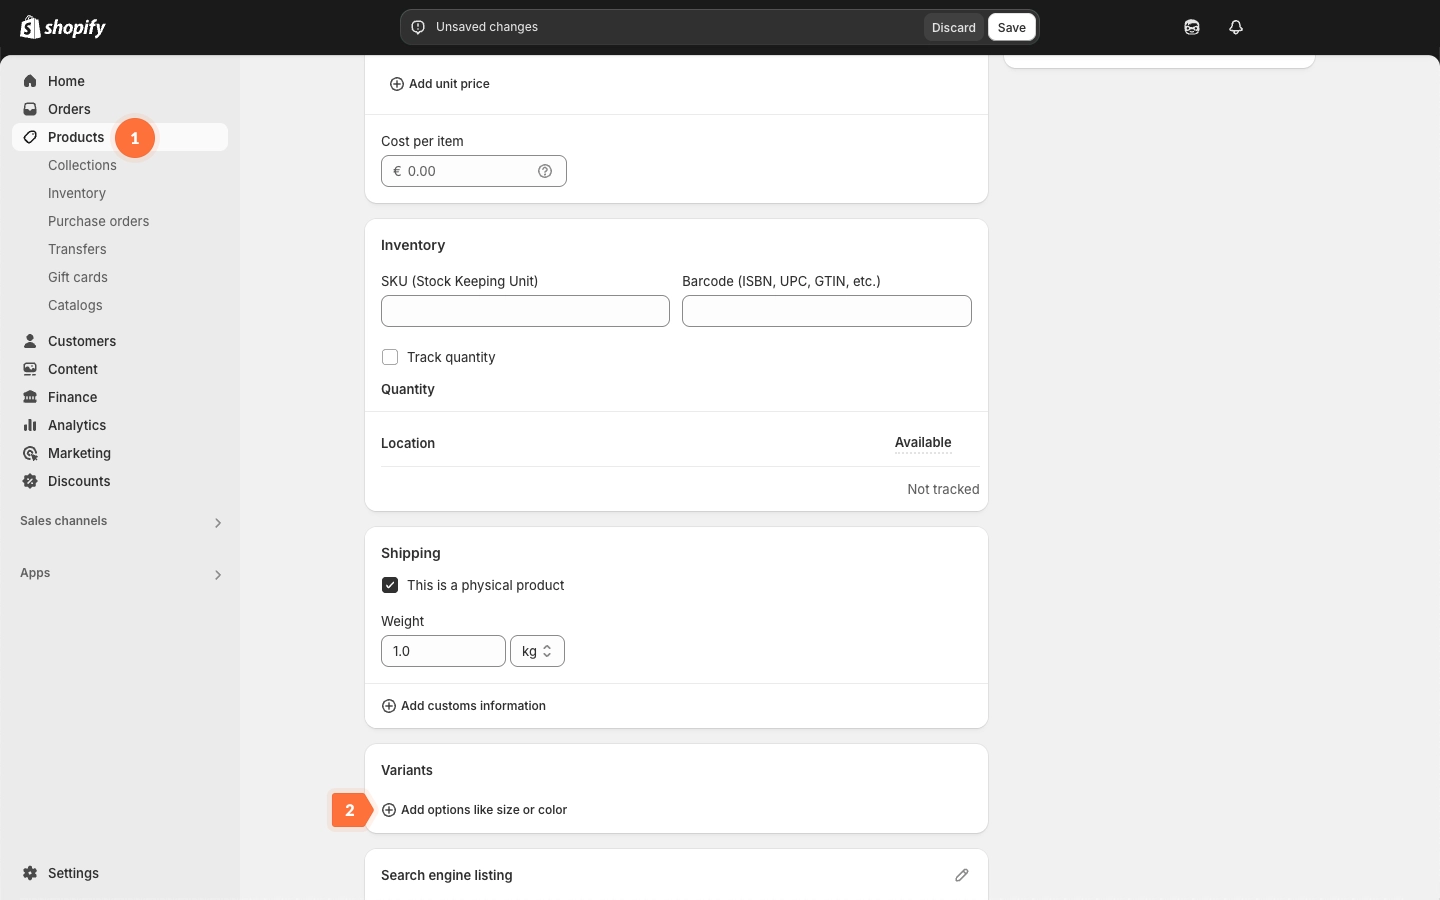
- Enter Option name and add as many options as your product has.
- Add thumbnails, enter prices and other necessary details.
- Save the changes.
Linking SC product templates to Shopify variants
- Ensure you create a separate product template in our app for each variant in your Shopify store. For example, if you have two different 3D pillow models, you need two SC product templates. If you're unsure how to set up a product, please refer to our guide.
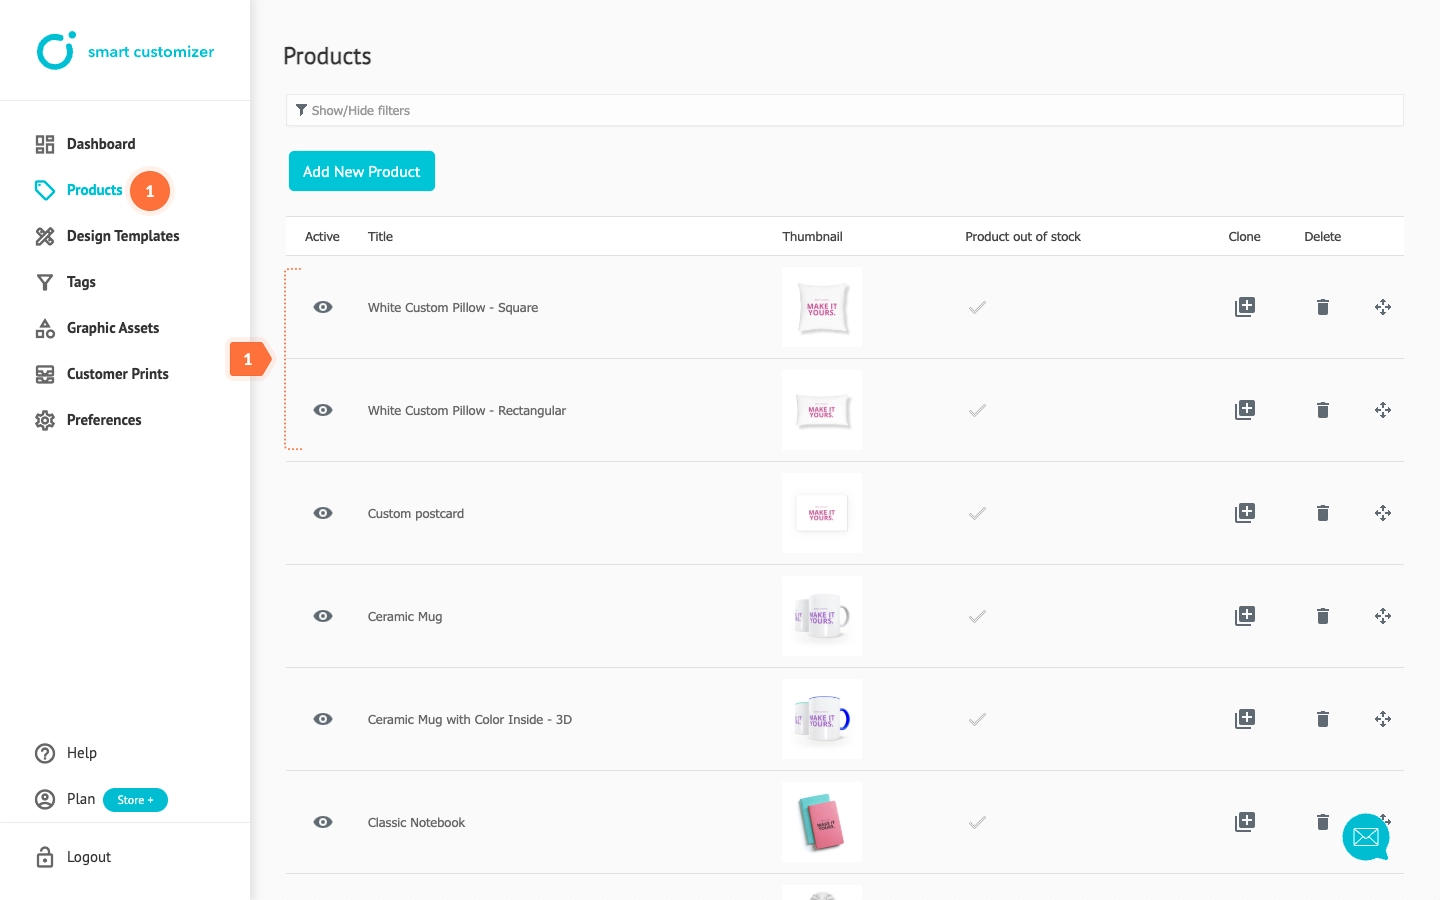
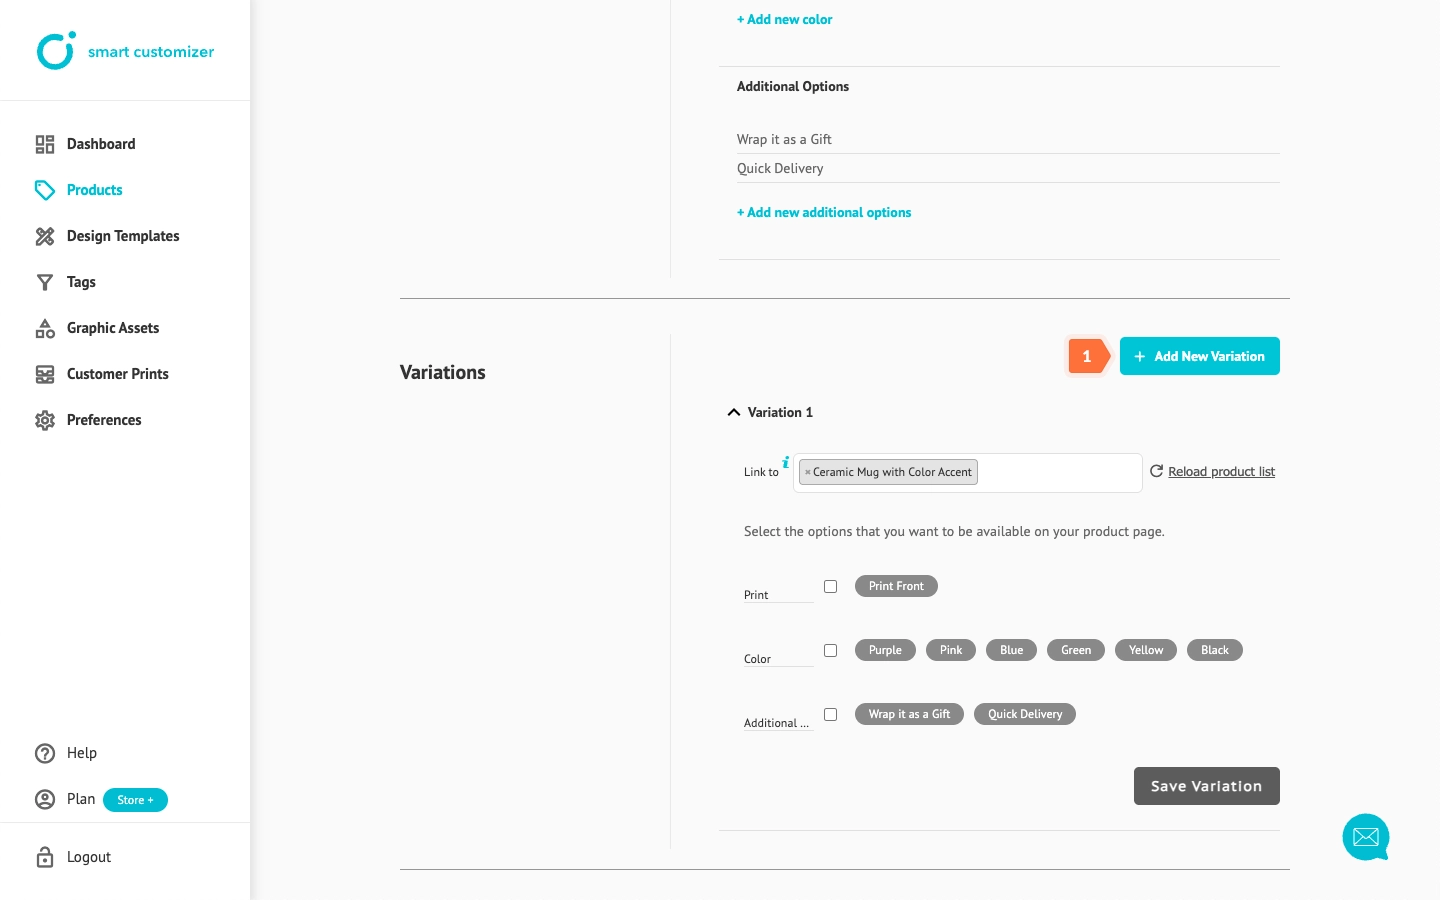
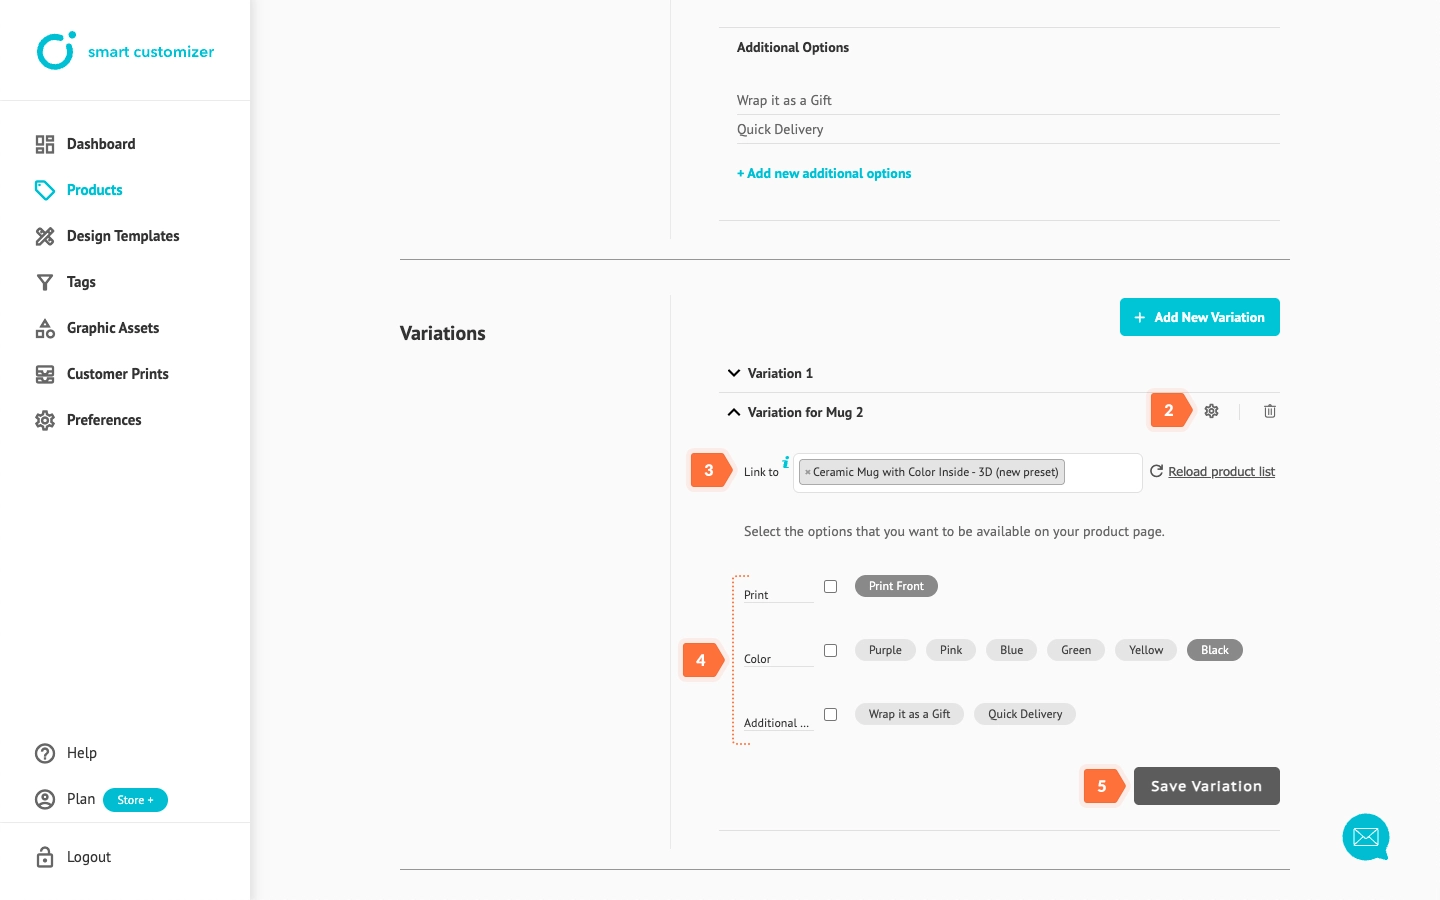
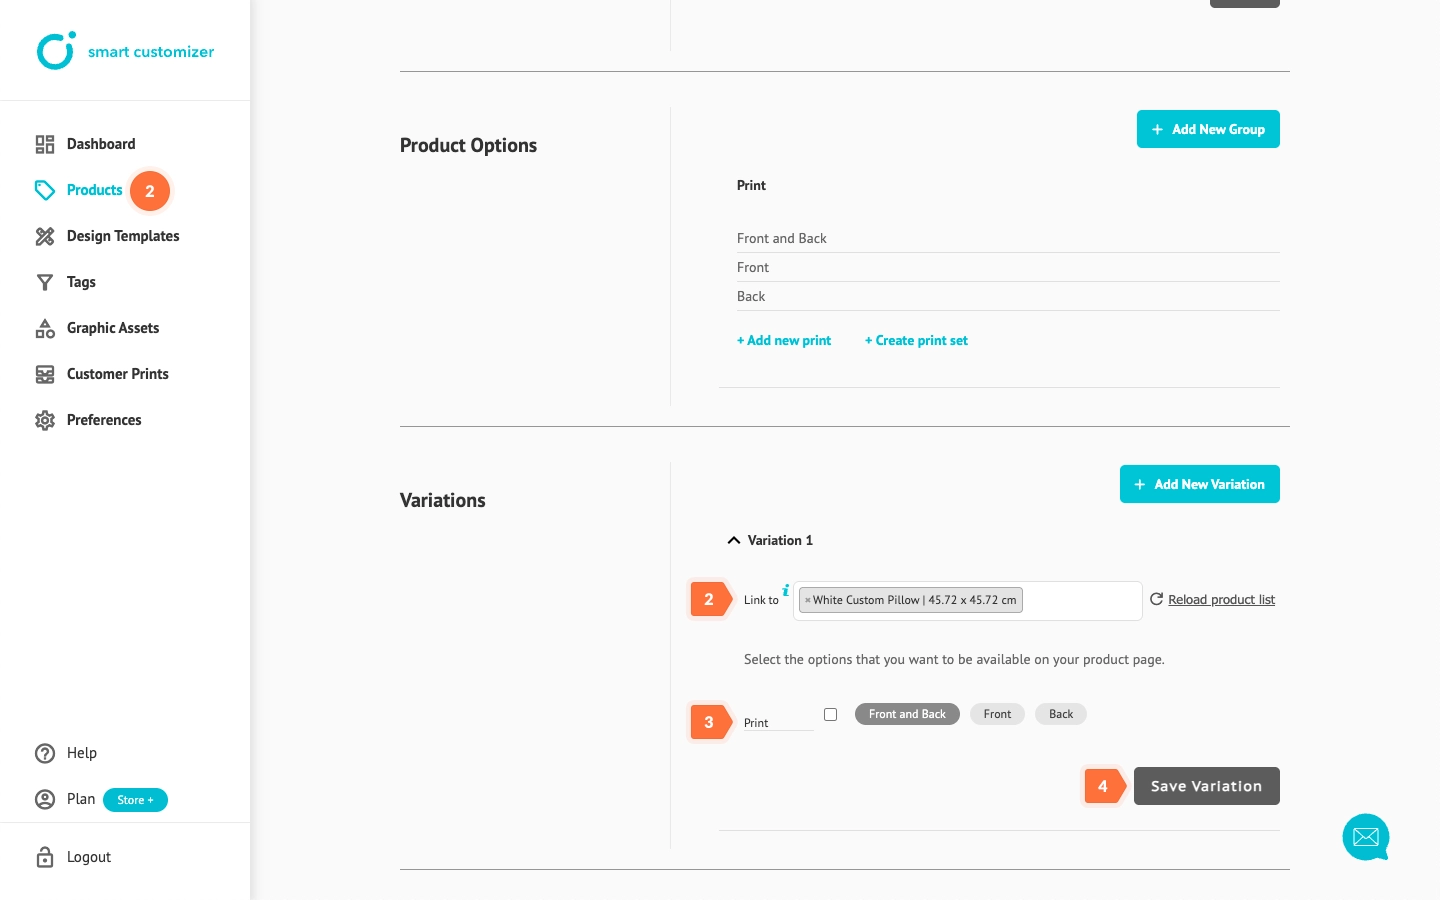
- Once you've set up your products, link each product template to its corresponding Shopify variant - open the Product template, go to the Variations section, and assign the appropriate variant.
- Choose the product options you want to include.
- Click Save Variation.
- Check how the variants work in the front.
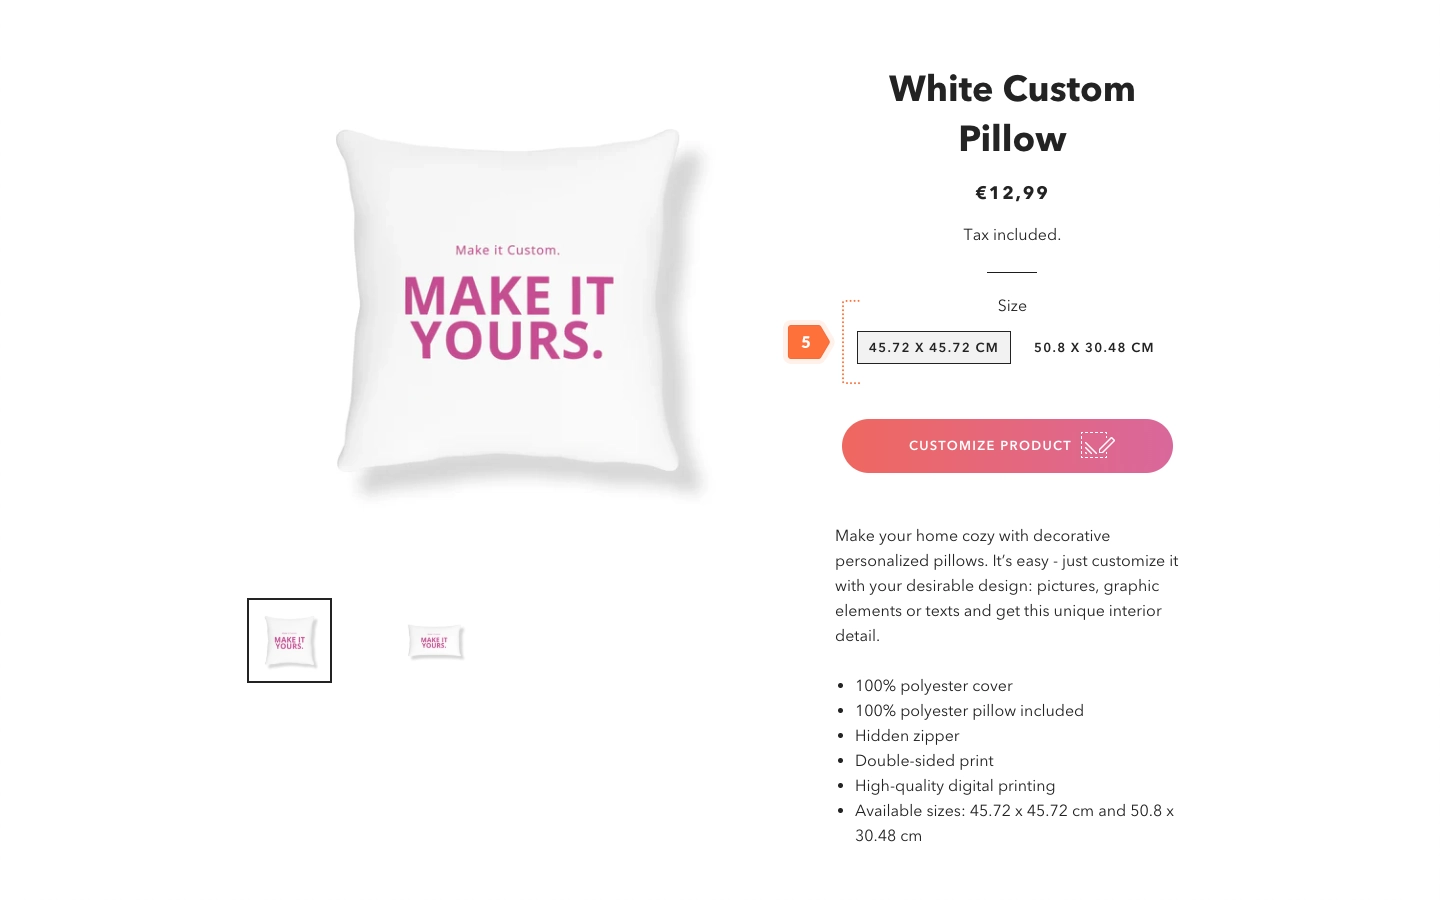
- If the Customize product button does not appear, please check the troubleshooting article or contact our support team.
Linking SC product variations to Shopify variants or products
Your SC product template can include as many variations as needed, each with different product options. You can assign each variation to a specific Shopify product variant or even a different Shopify product.
