Advanced 2D product set up
About advanced set up
If you've already mastered setting up simple 2D products, the next step is enhancing their appearance further. By adding Extra setup layers, you can:
- Improve product previews for a more realistic experience.
- Show specific product or printing details.
In this knowledge base, you'll discover the full process of crafting an advanced 2D product template.
Before we get started
Before you start, prepare all the images necessary to set up the product. For the phone case, I will be using:
Make sure you have also prepared all other product-related information, such as the title, description, real-world scale dimensions, and print size.
Product installation
Follow the same steps as for basic 2D template product installation.
Model image update
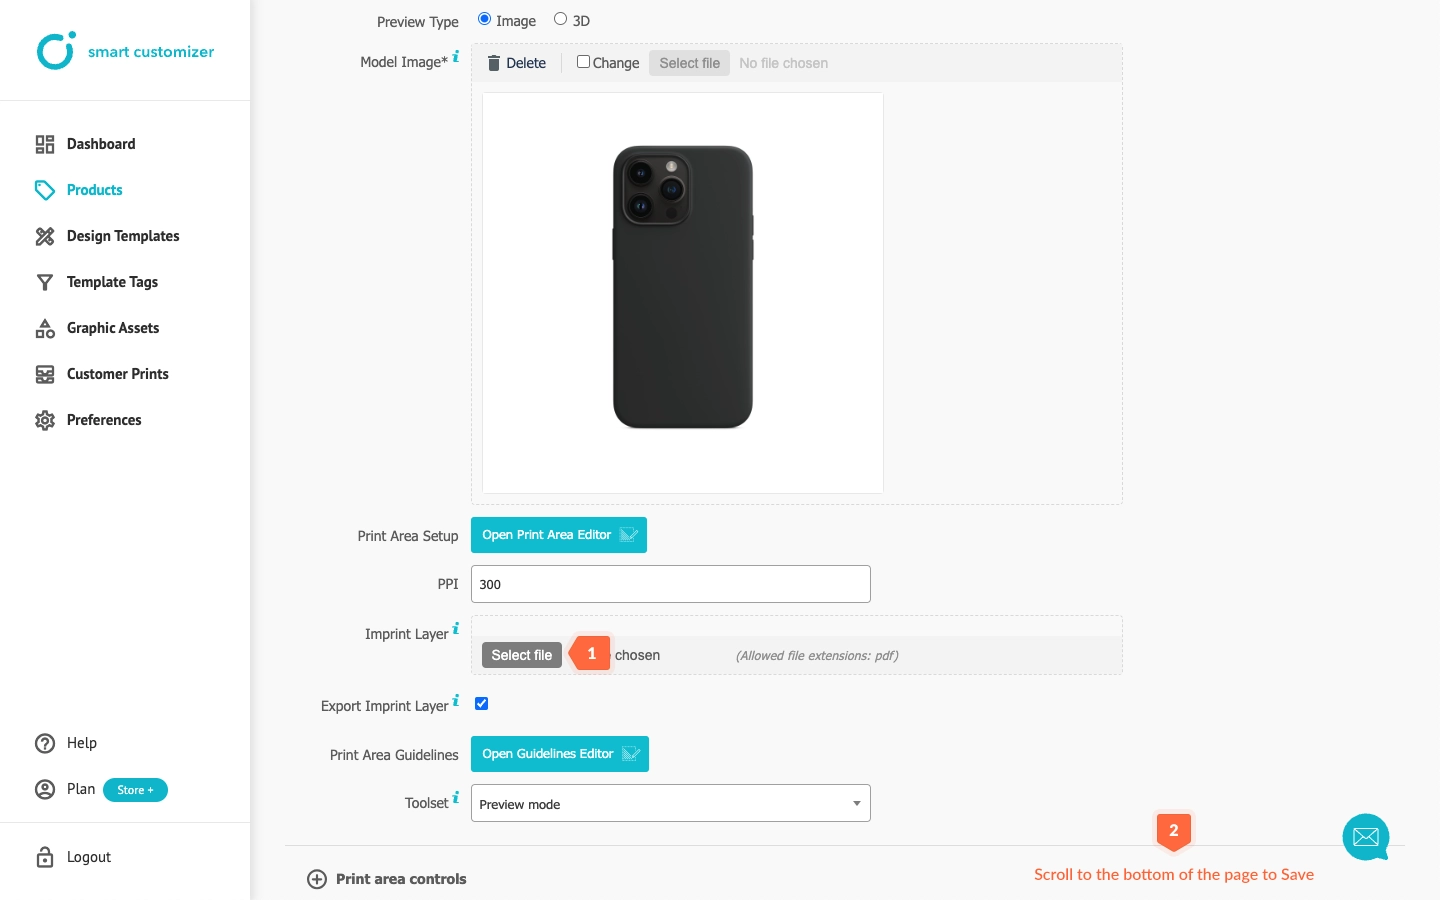
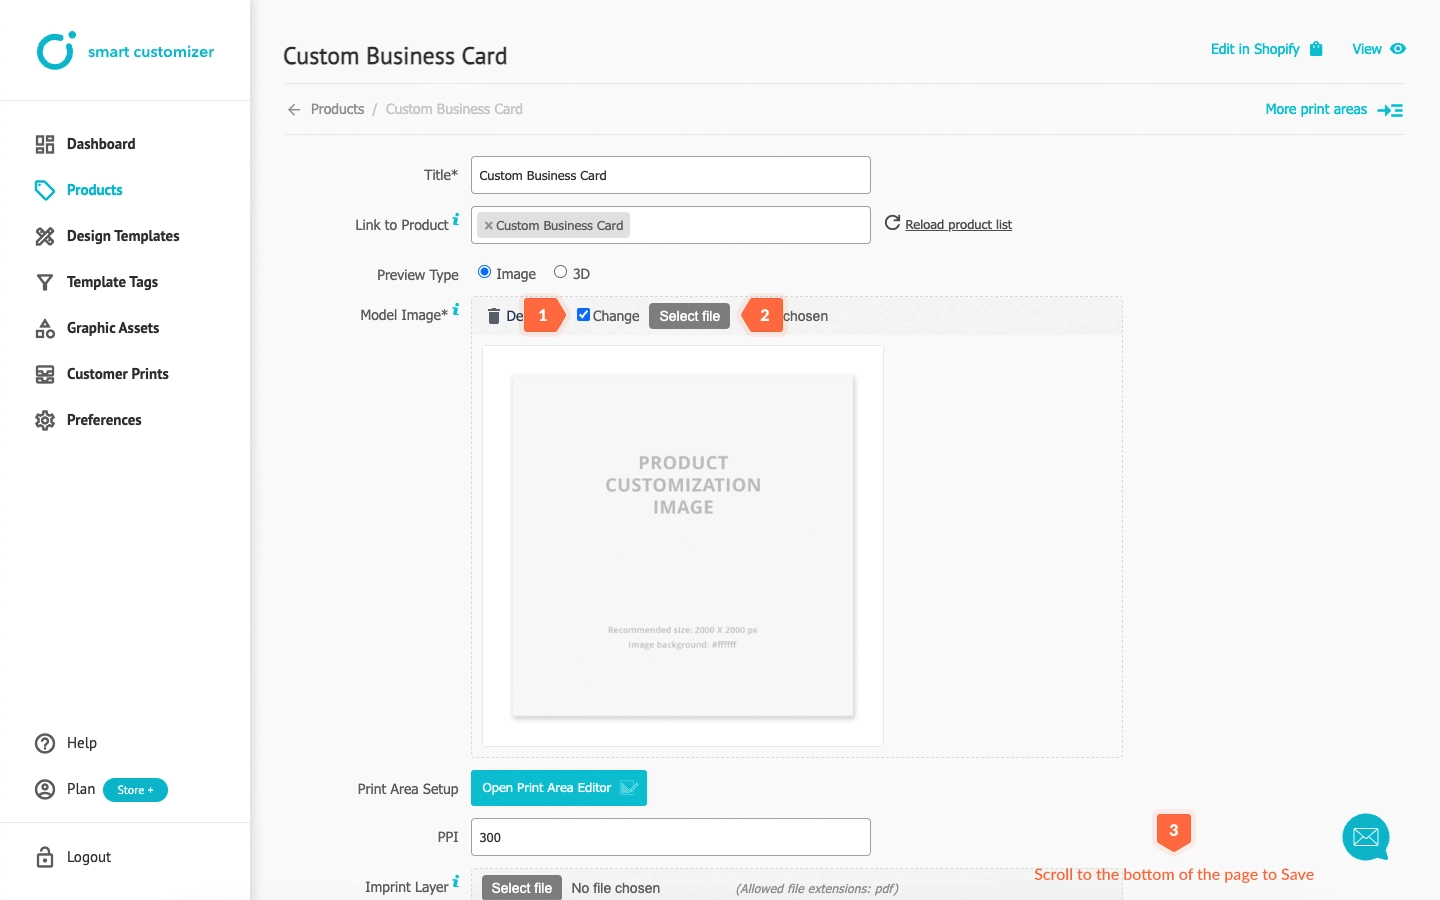
- First thing to do - upload your product image. To do so, click Change in the Model Image section
- Then Select file.
- Afterward, scroll down and Save the changes.
Product size and Print area
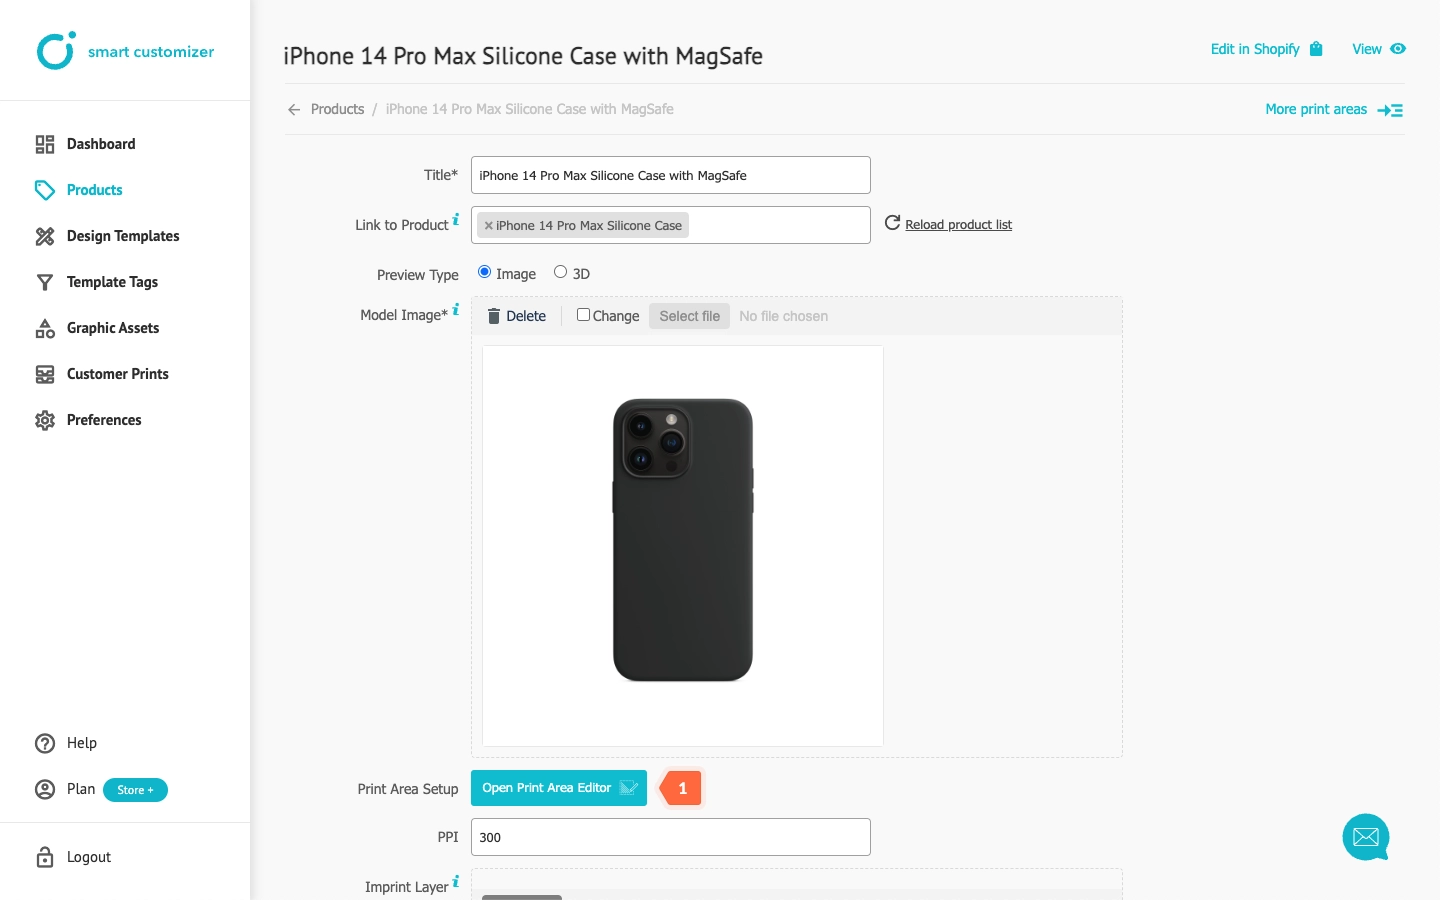
- To see further customization options, click on Open Print Area Editor.
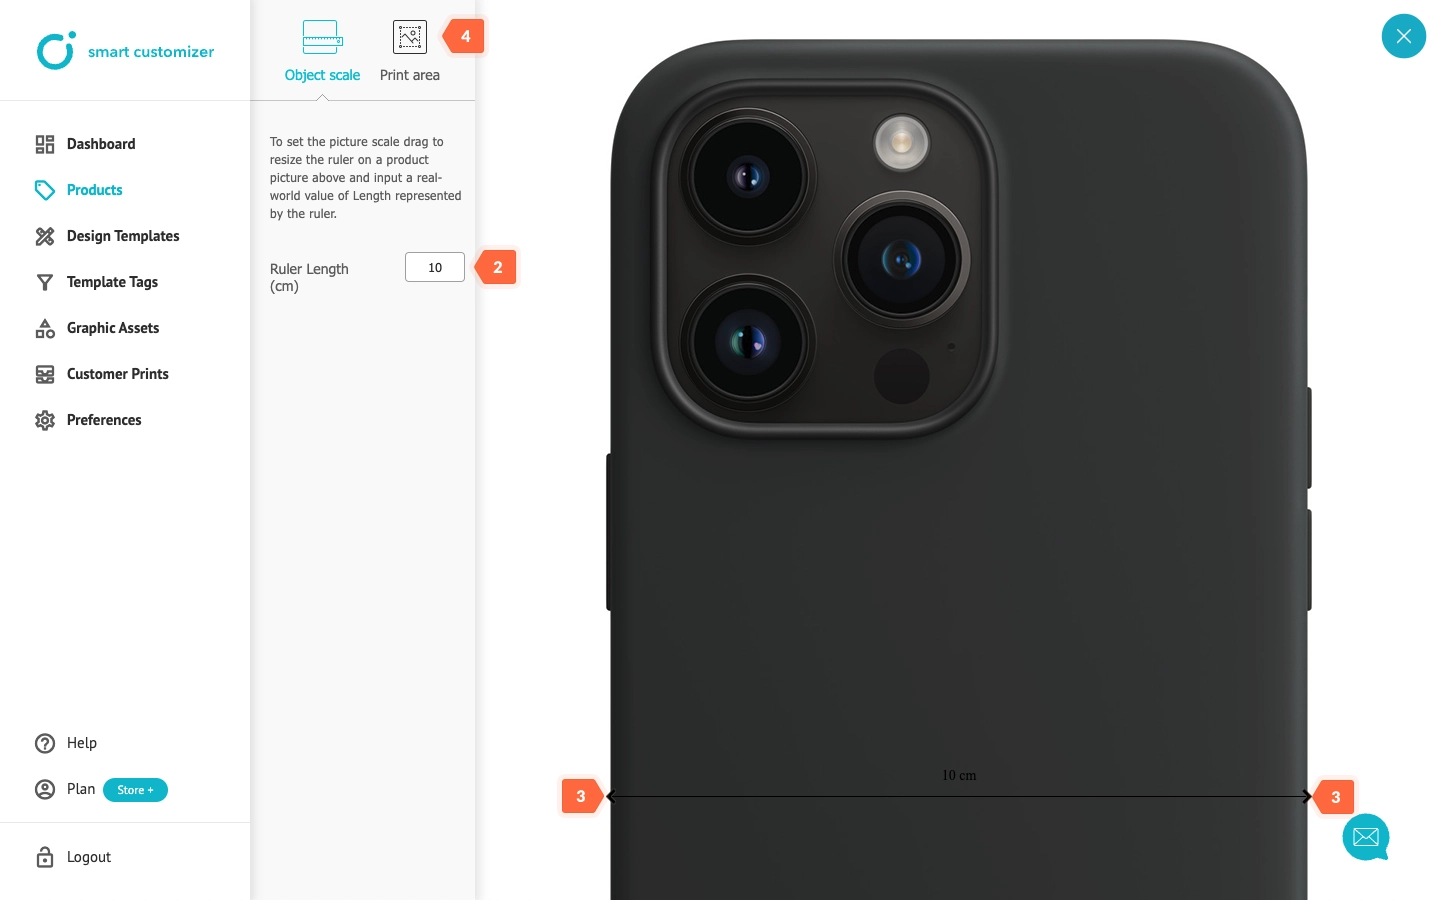
- Enter product's real-world scale dimensions in Ruler Length.
- Align the arrows to touch the sides of the product by clicking on them and scrolling to the appropriate positions.
- Click Print Area.
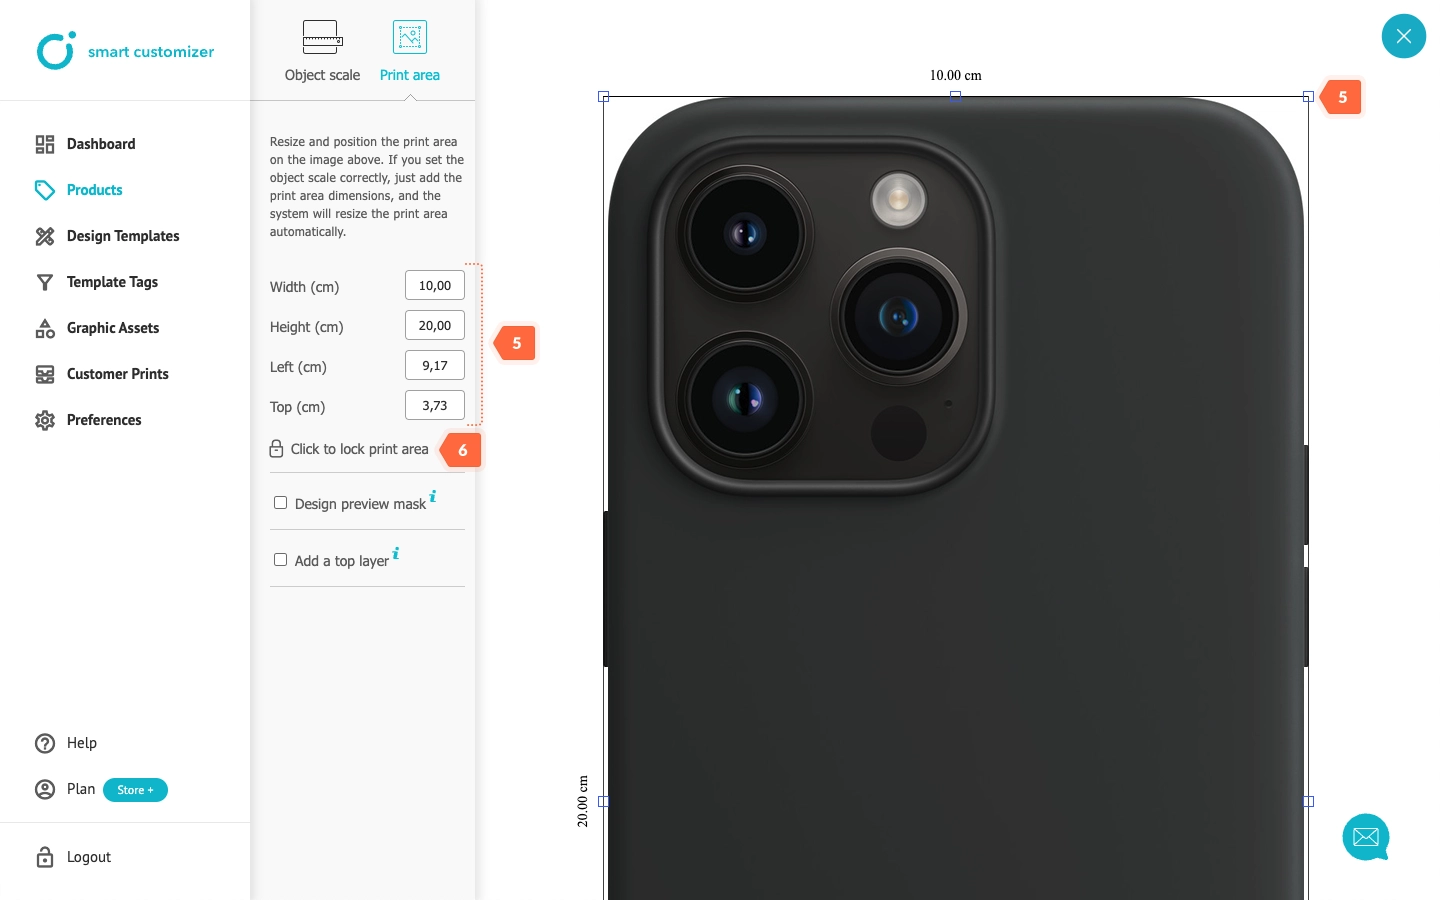
- Define the print size by either entering numbers or adjusting the size using the blue squares. It can be slightly larger than the object to avoid any graphic cuts.
- To prevent accidental changes, lock the print area by selecting Click to lock print area.
Do not close the window. We will continue with the next layers.
Preview mask
Because the case features a camera hole, it's essential for users to avoid placing important graphics in that area, as they will be cut out. The Preview mask establishes the design's visibility boundaries. Anything positioned outside these boundaries will not appear in the product preview.
- Click on the Design preview mask.
- Select custom mask shape.
- Upload mask by clicking Upload your SVG mask.
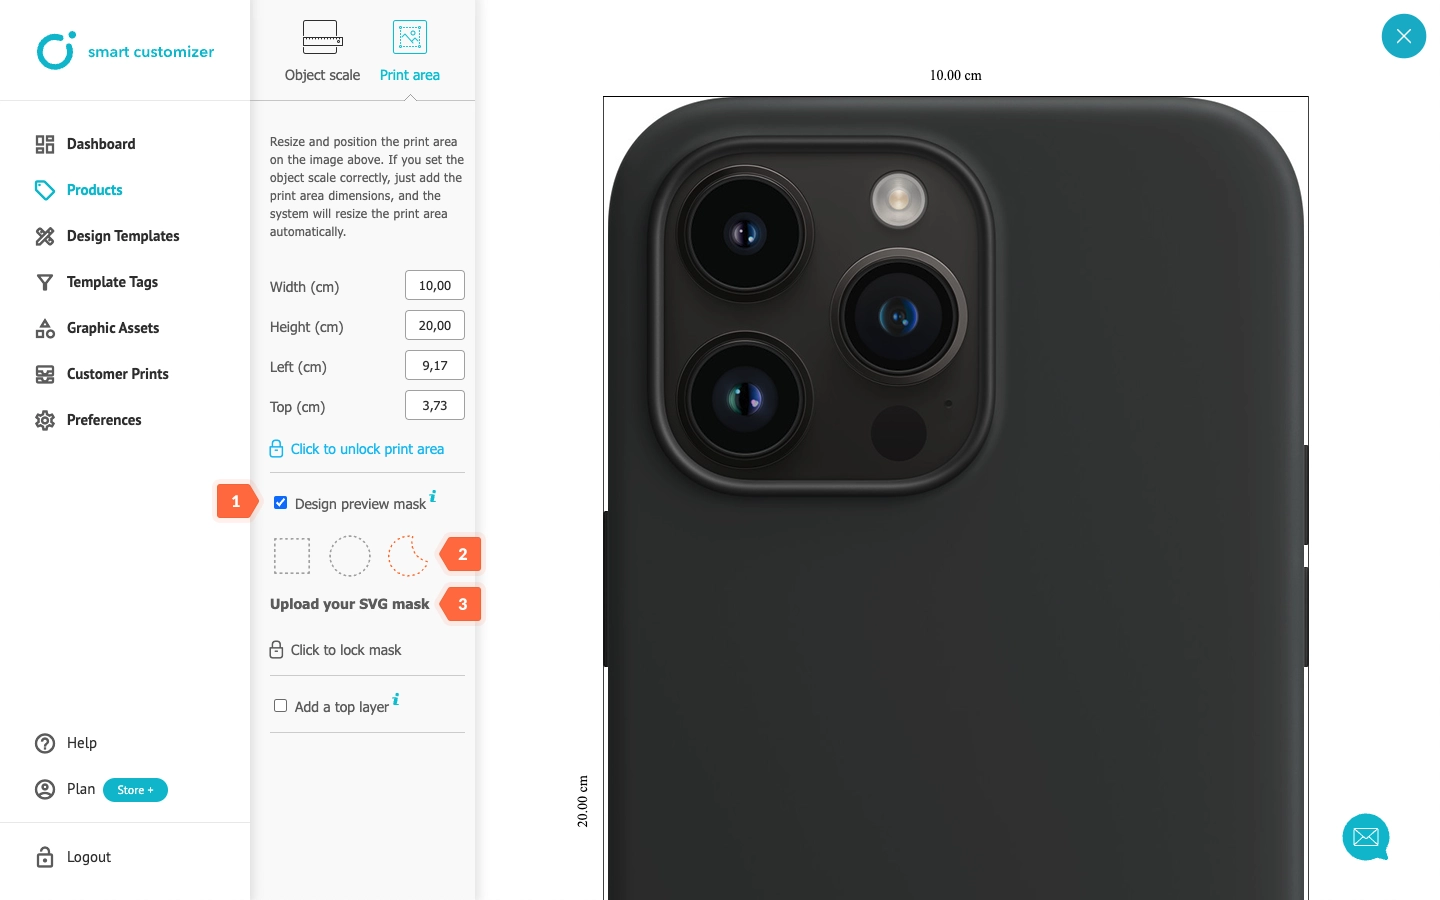
- Resize the mask by entering values or adjusting its size using the orange squares.
- To prevent unintentional adjustments, Click to lock mask.
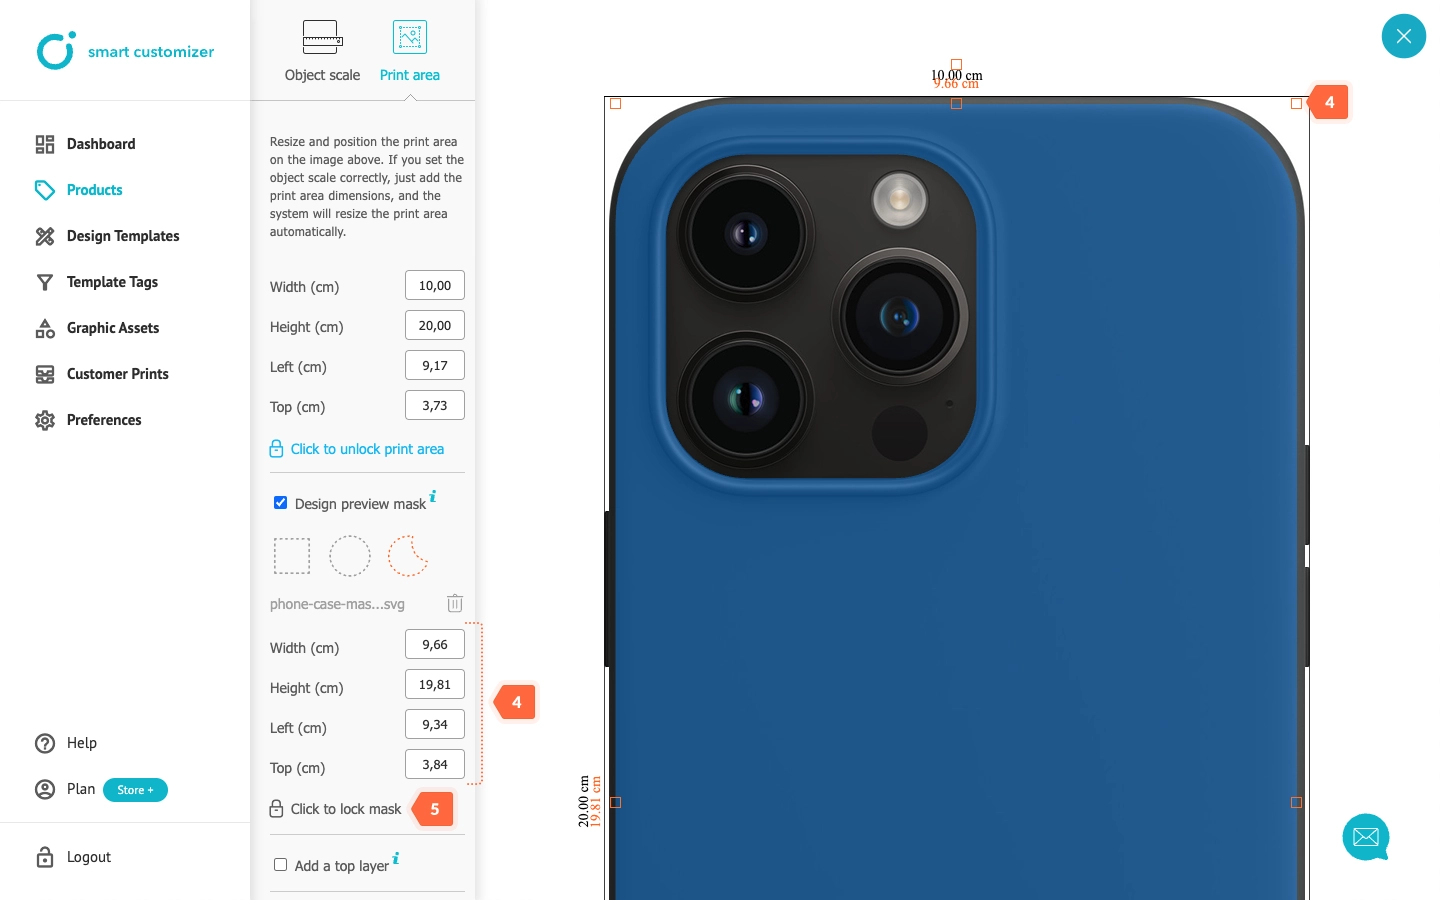
The next step will be adding a Top layer.
Top layer
When displaying a design on the phone case, it may appear flat and unrealistic. To address this issue, you can use the Top layer. This layer includes essential shadows for a preview and won't be included in the final print export.
- Click Add a top layer.
- Upload your image.
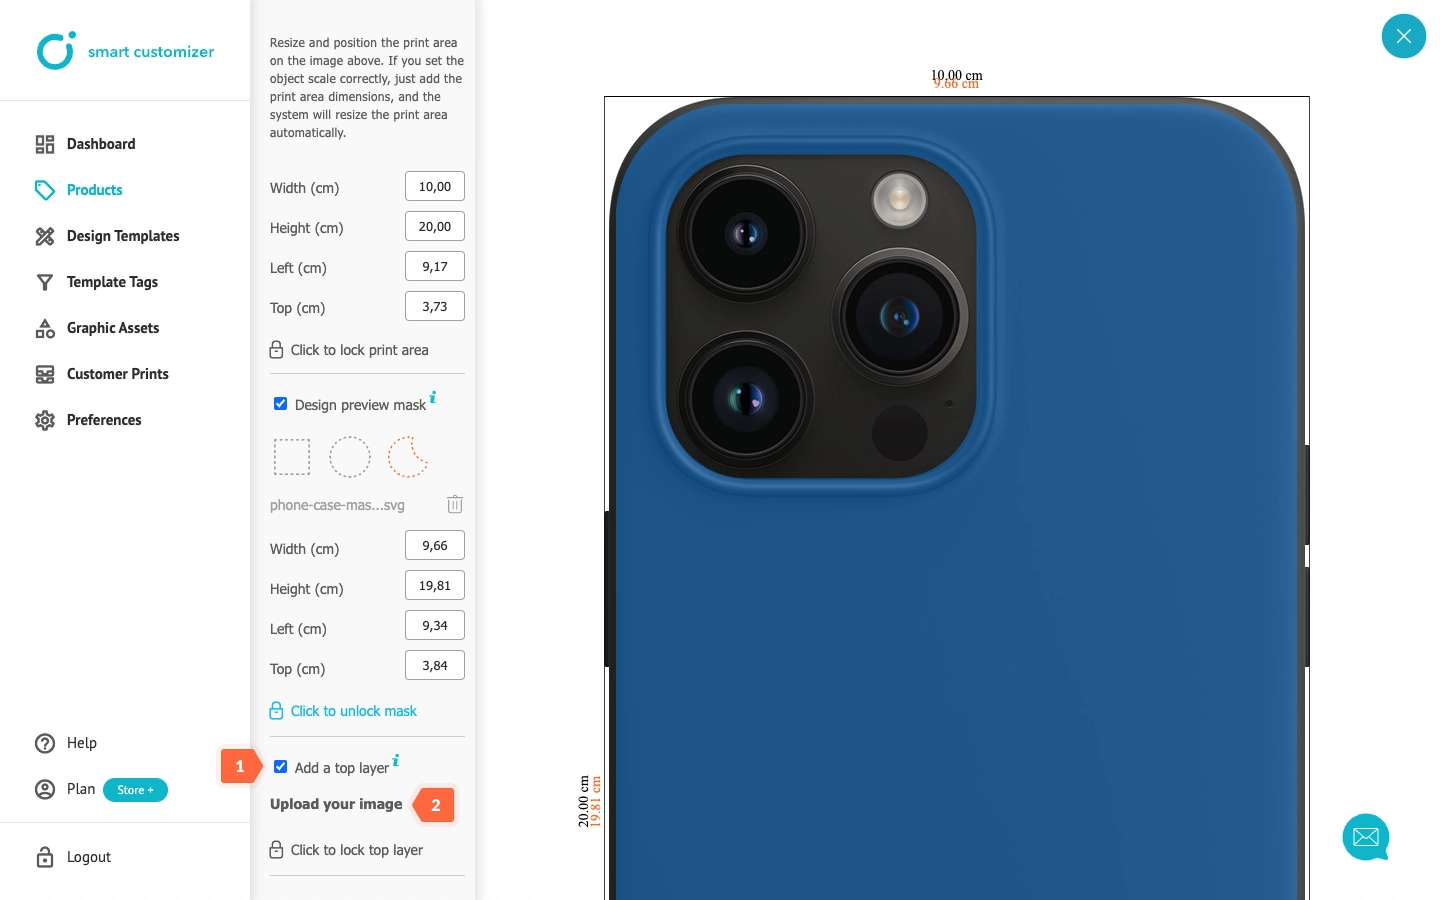
- Adjust the placement of the Top layer (its size cannot be changed; it will remain original)
- To prevent accidental moves, lock the top layer by selecting Click to lock top layer.
- To finish click X.
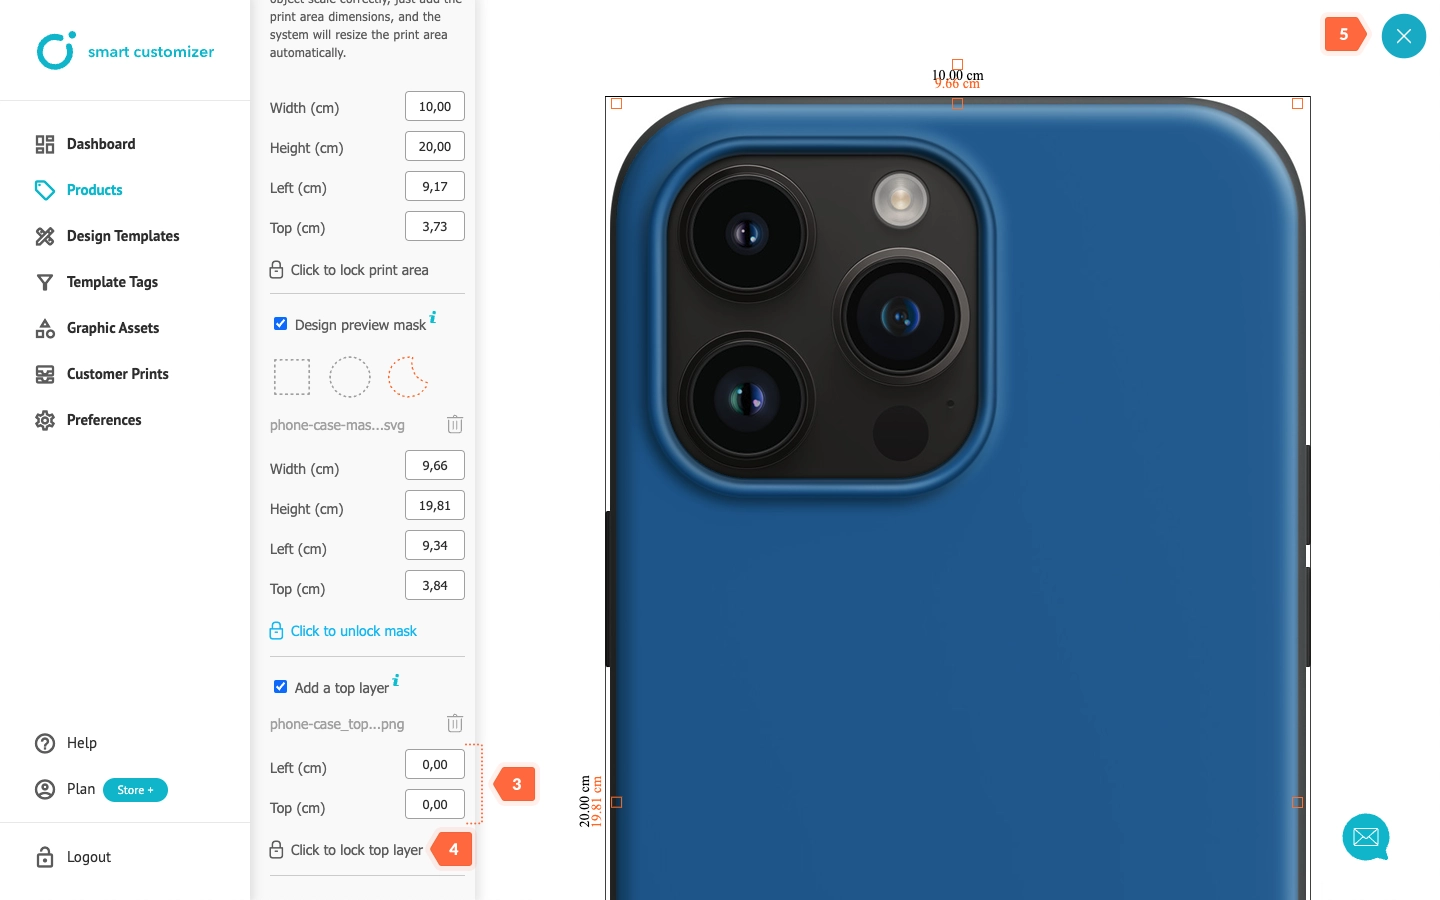
- Save the changes.
NOTE: You can test each change by clicking on View > Customize product.
Imprint layer
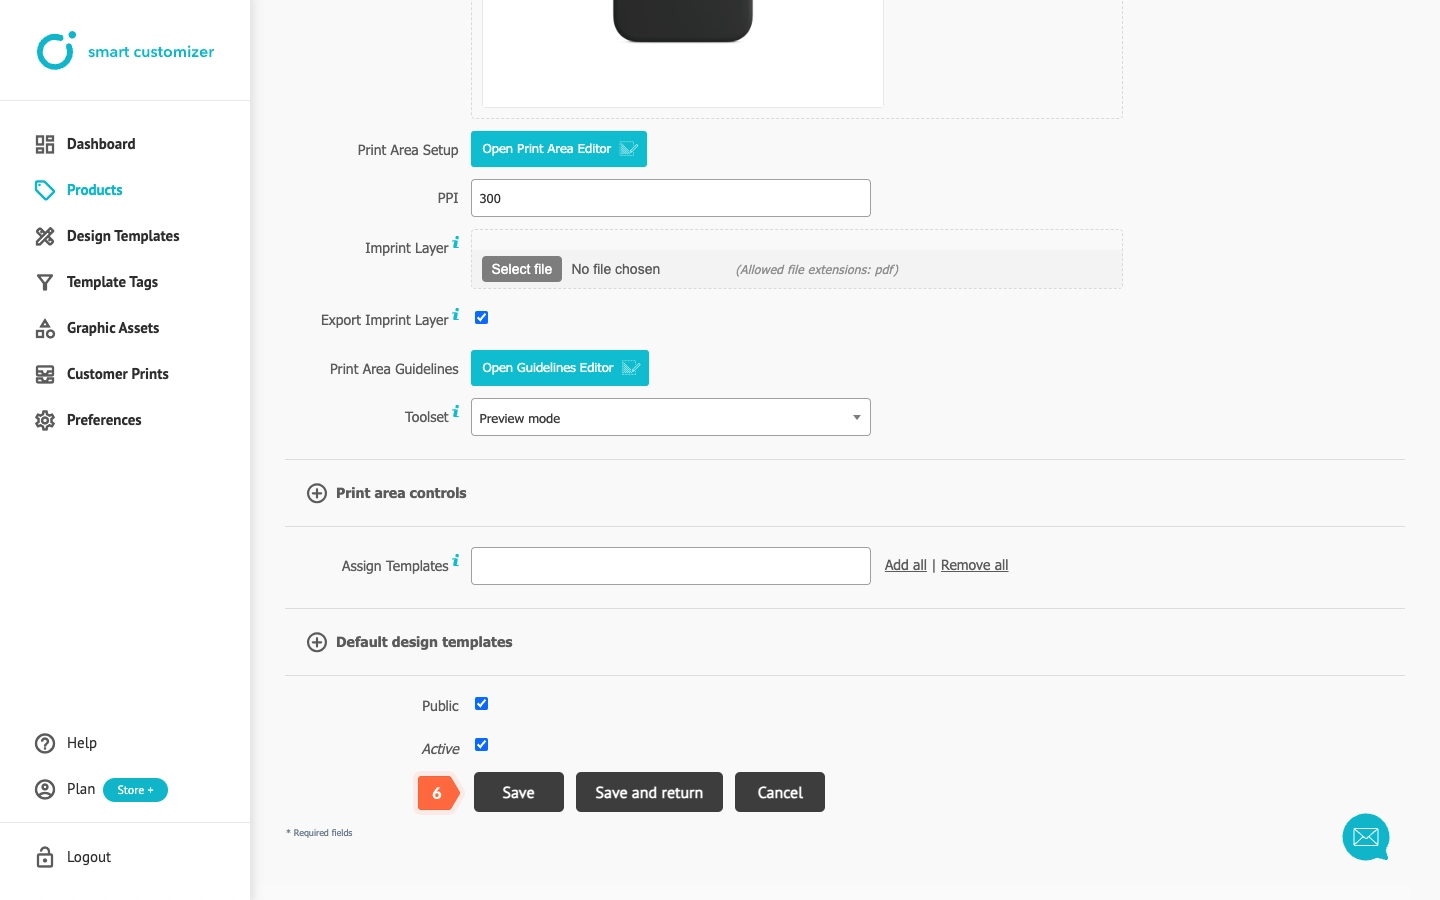
Some products contain non-editable elements, like the company's logo. In our app it is called the Imprint layer. When preparing those files, ensure artboard dimensions match the print area size, as edits won't be possible after upload. Upload the layer only in .pdf format.
Guidelines layer
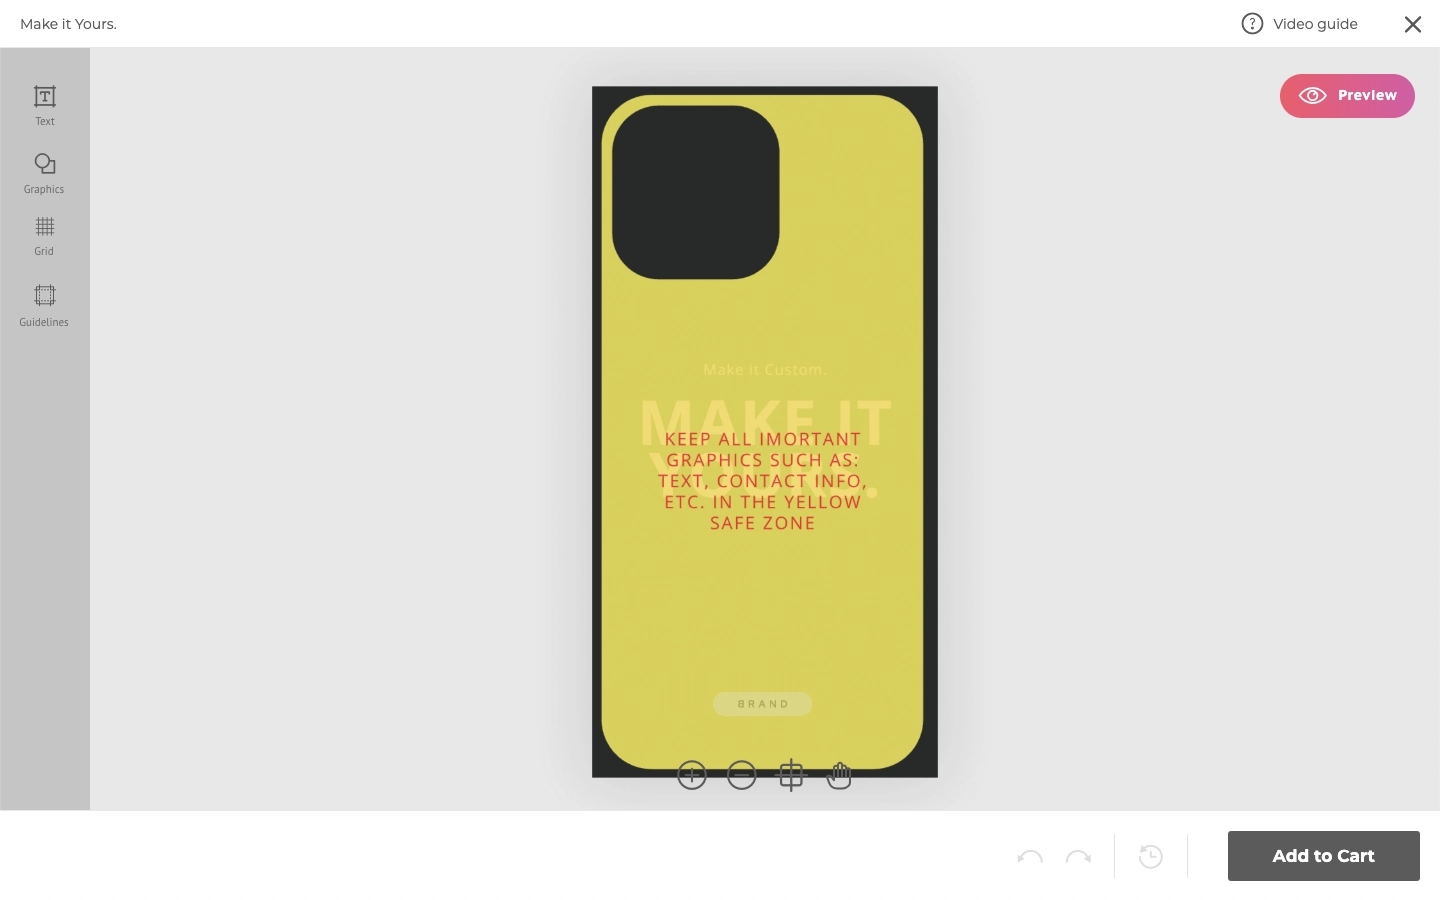
If a product has a little more difficult shape, it's advisable to use the Guidelines. This will assist customers in designing a product without any cuts and serve as a recommendation for where to position graphics to achieve a visually appealing composition.
- Click Open Guidelines Editor.
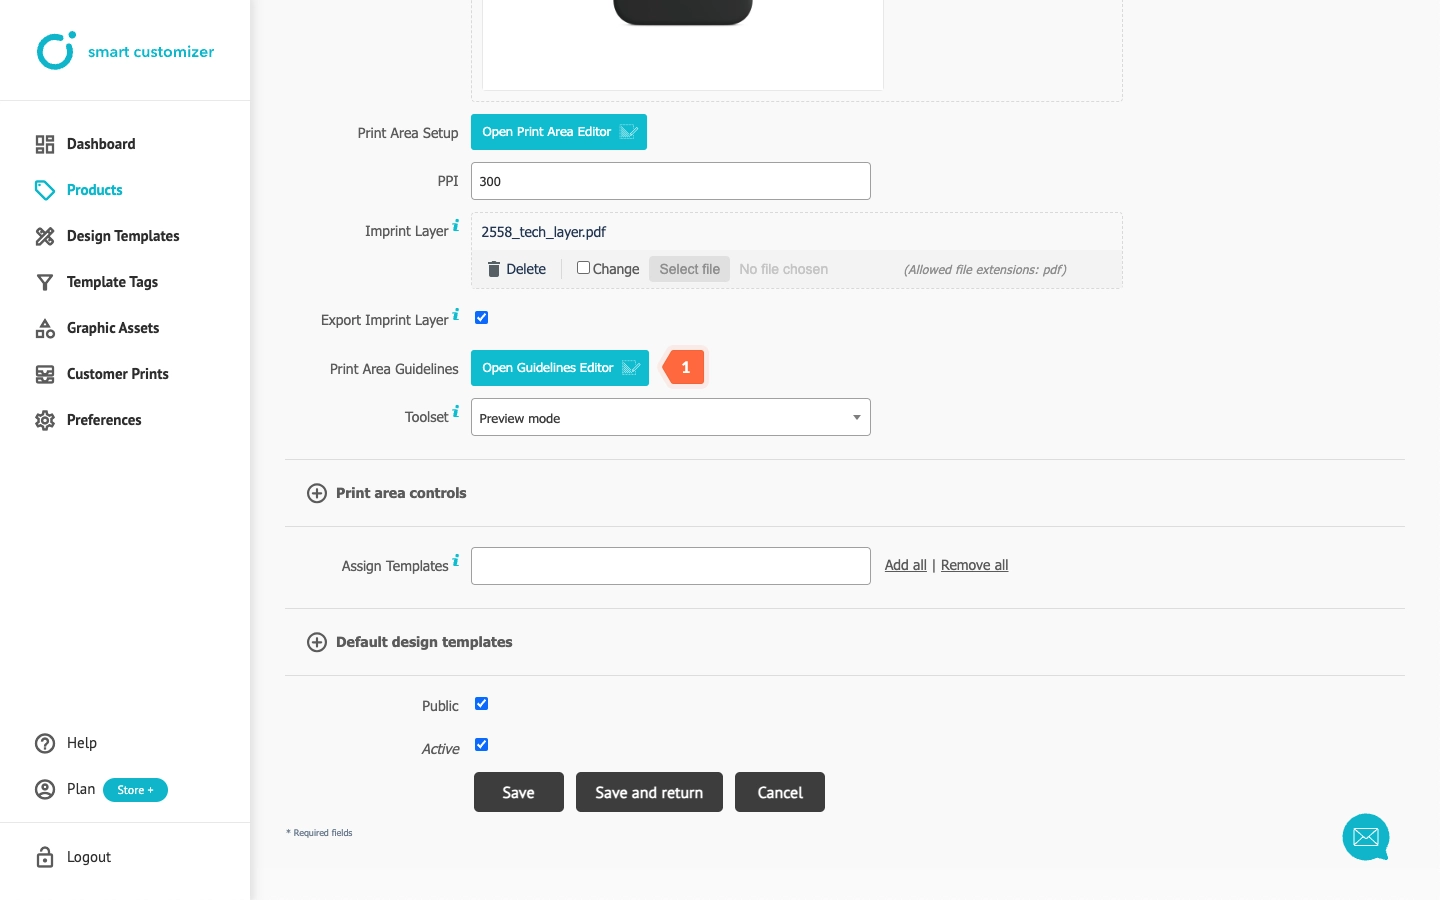
- Click Graphics.
- Add your prepared file or create guidelines using the online editor. NOTE: As you can see, the imprint layer is already visible.
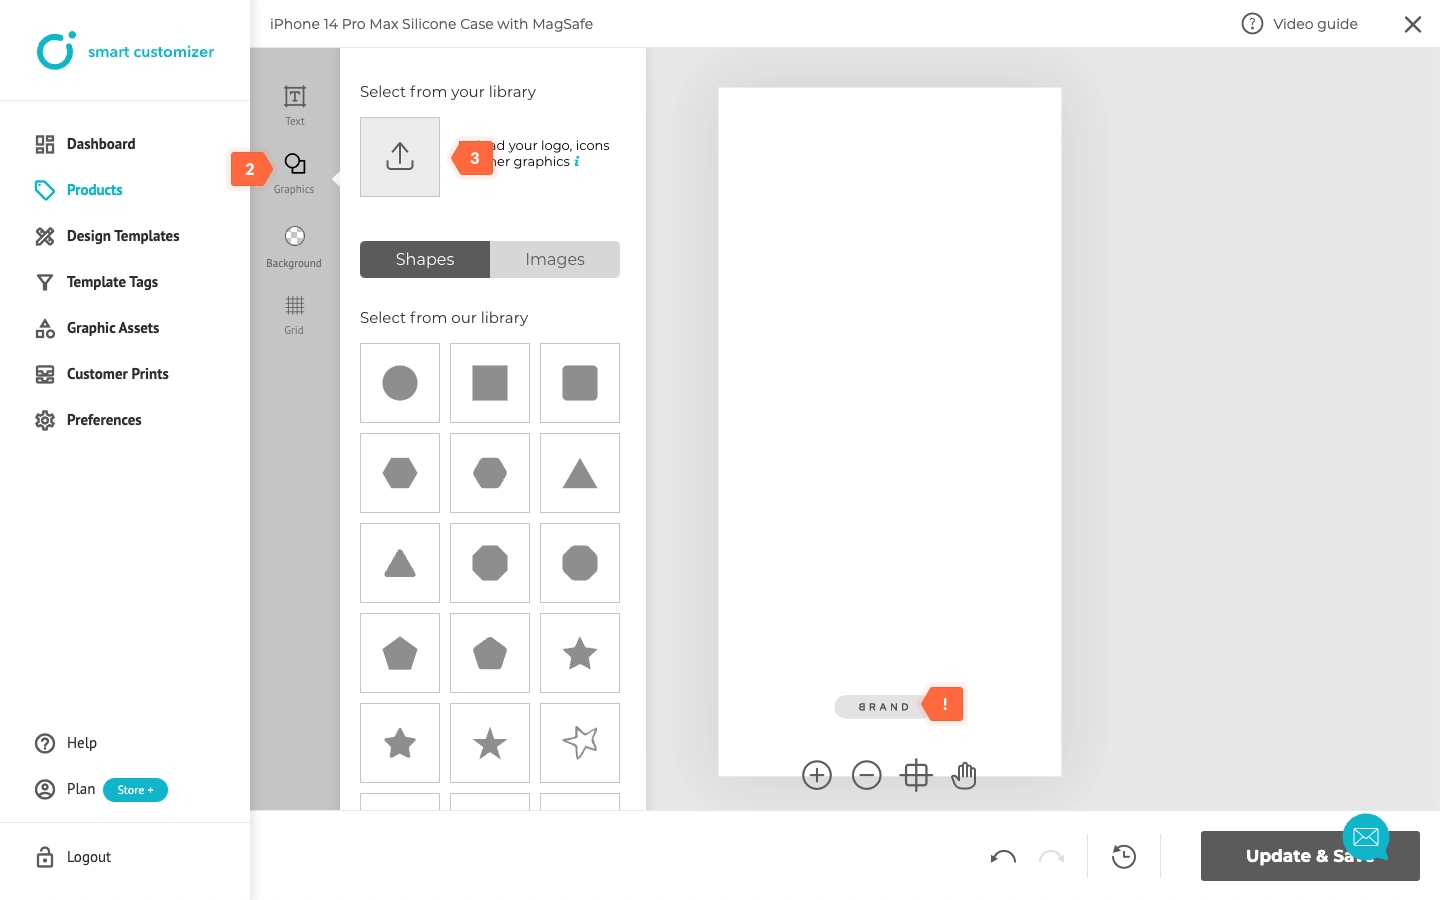
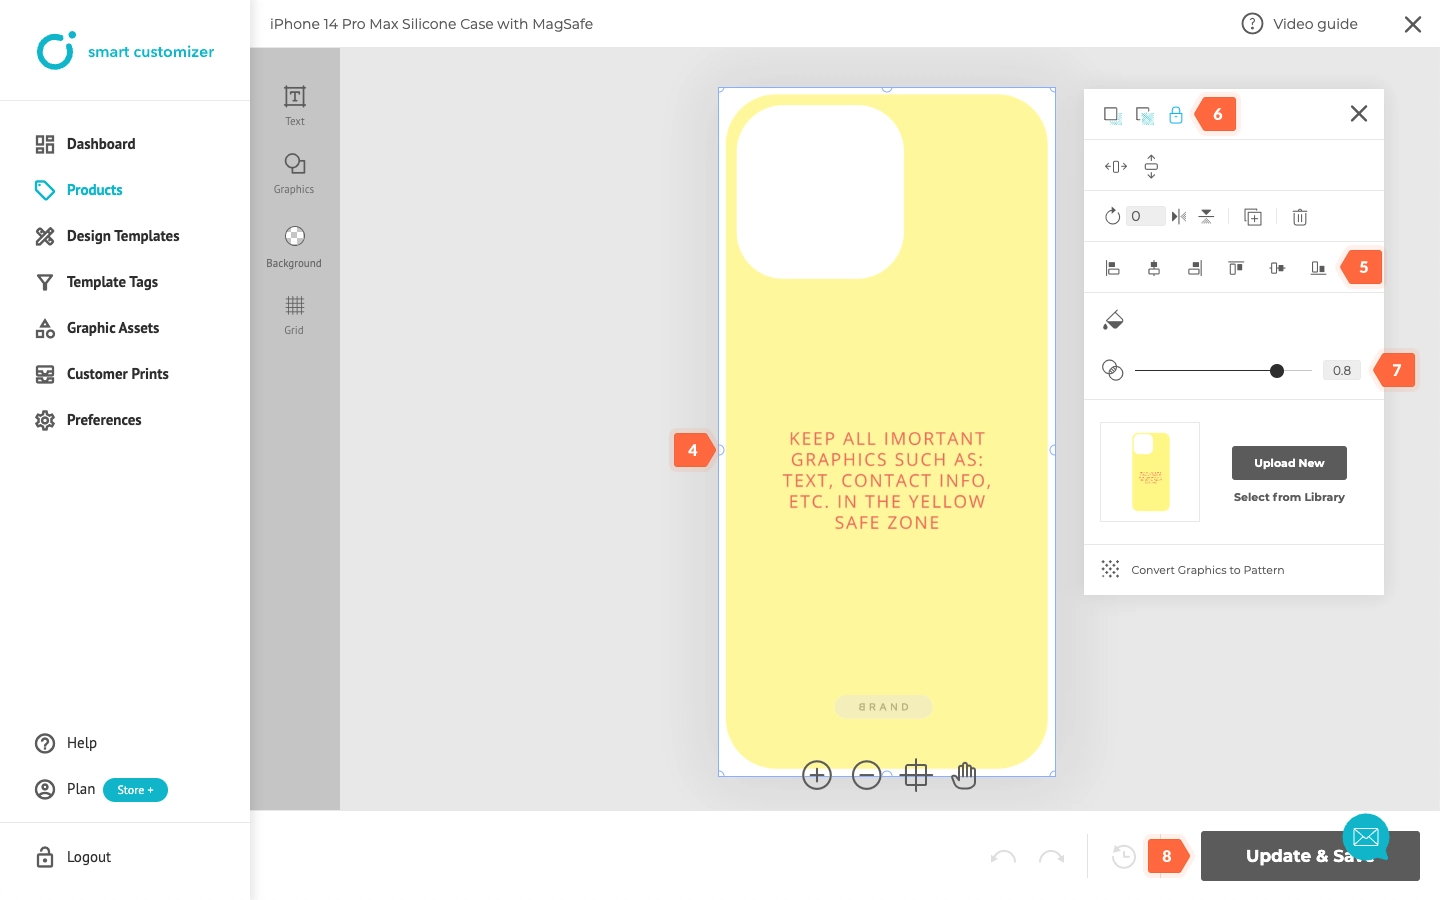
- If needed, adjust the image size by dragging the blue circles.
- Since it aligns directly with the print area, you can use Centering tools to position it accurately.
- Lock the image to prevent accidental user movements.
- Decrease visibility - in this case, the customer will be able to see both the design template and guidelines layer simultaneously.
- Save the changes.
Design templates
- To enhance the presentation of your product, assign Design templates to showcase possible print examples. Learn how to prepare design templates here.
- Set Default design template so that the product will already appear with a print.
- Save the changes.
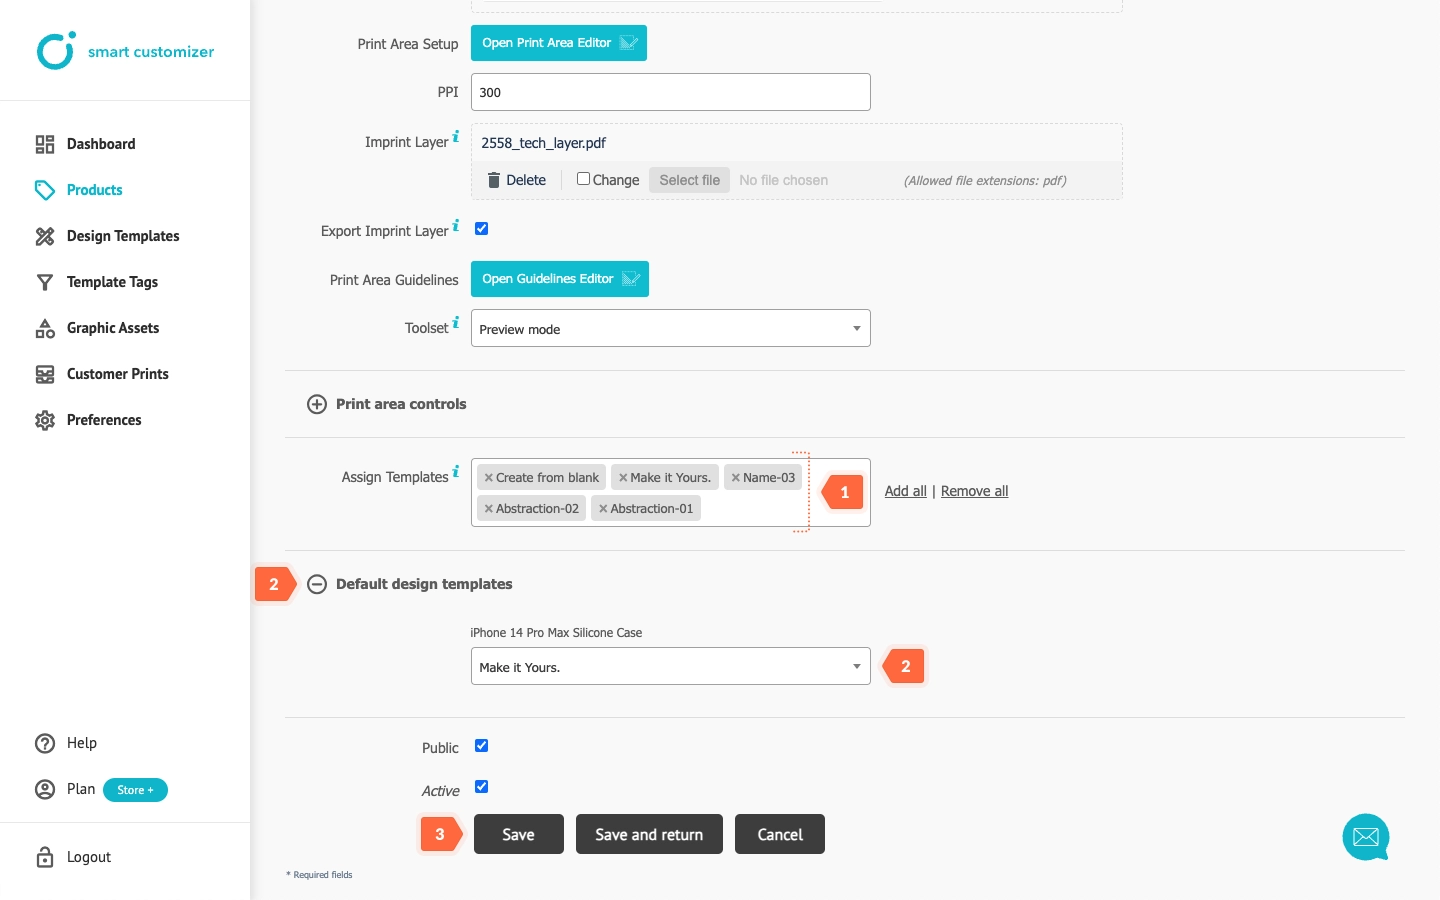
The design templates will be listed on the left:
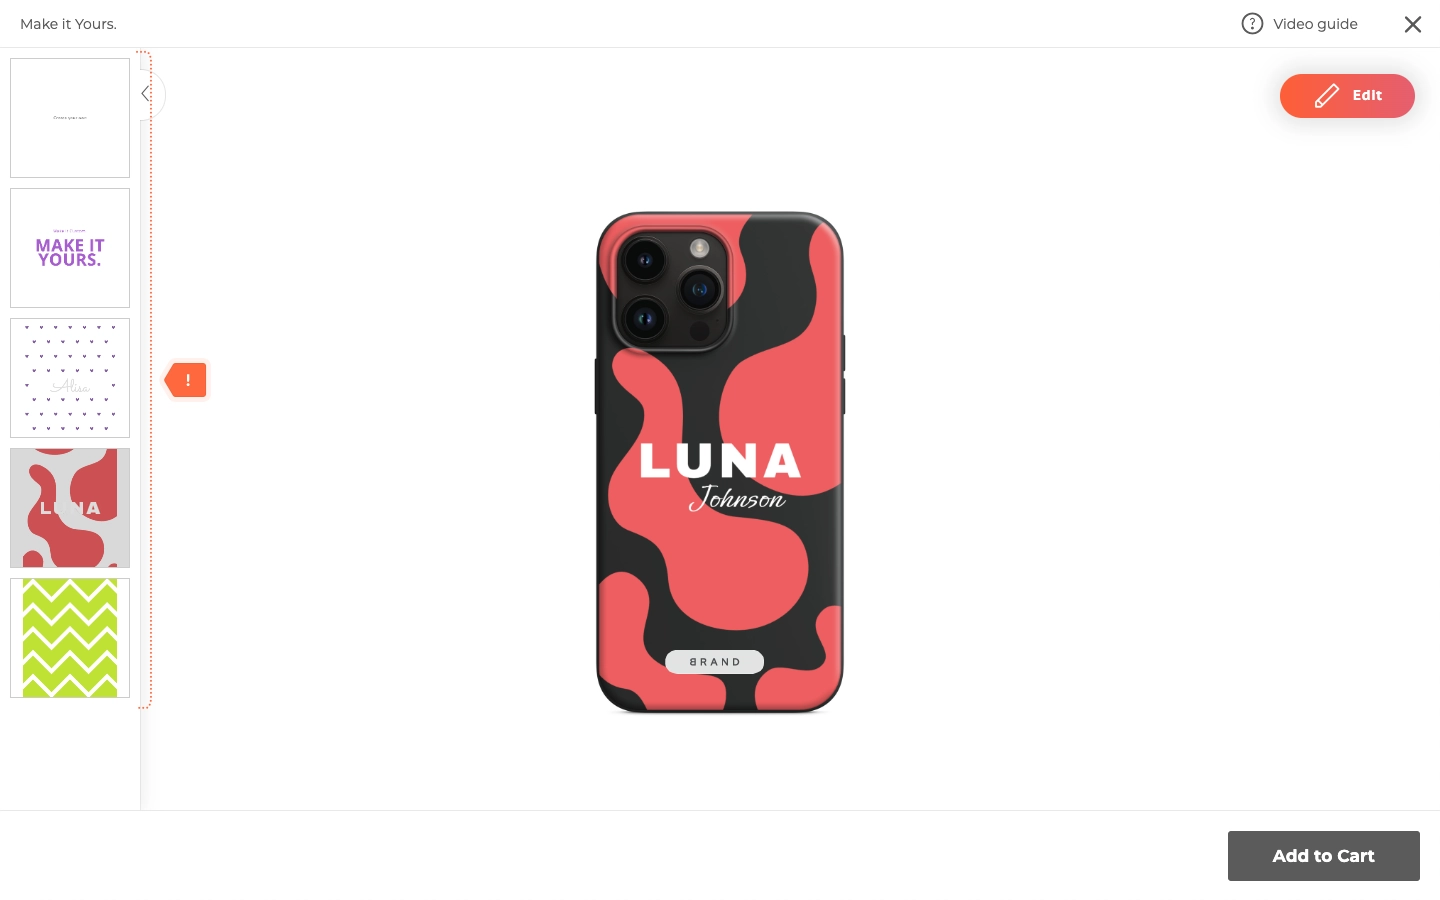
Additional toolset
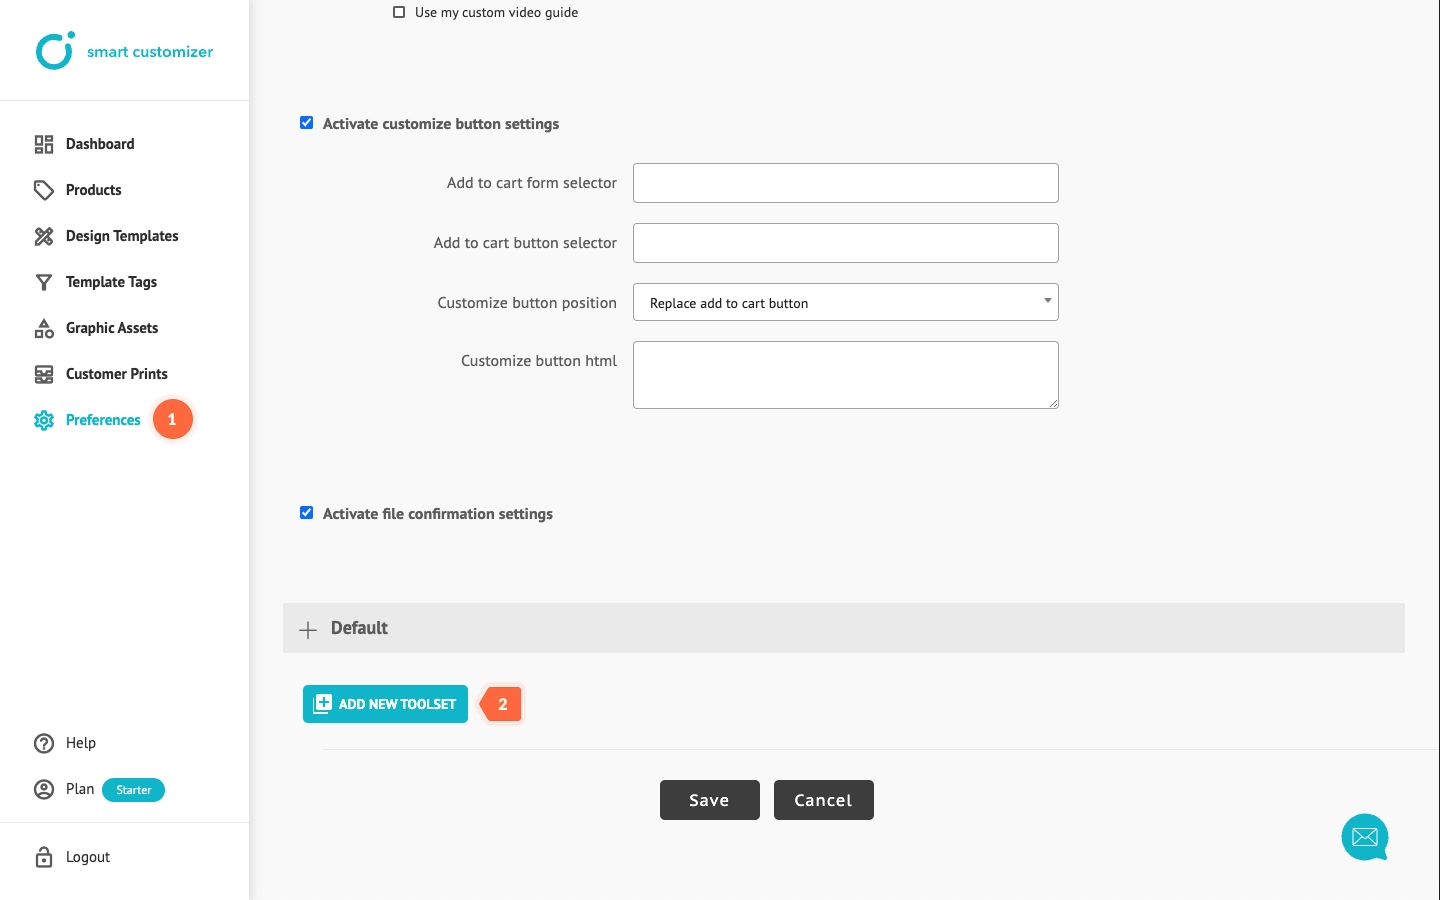
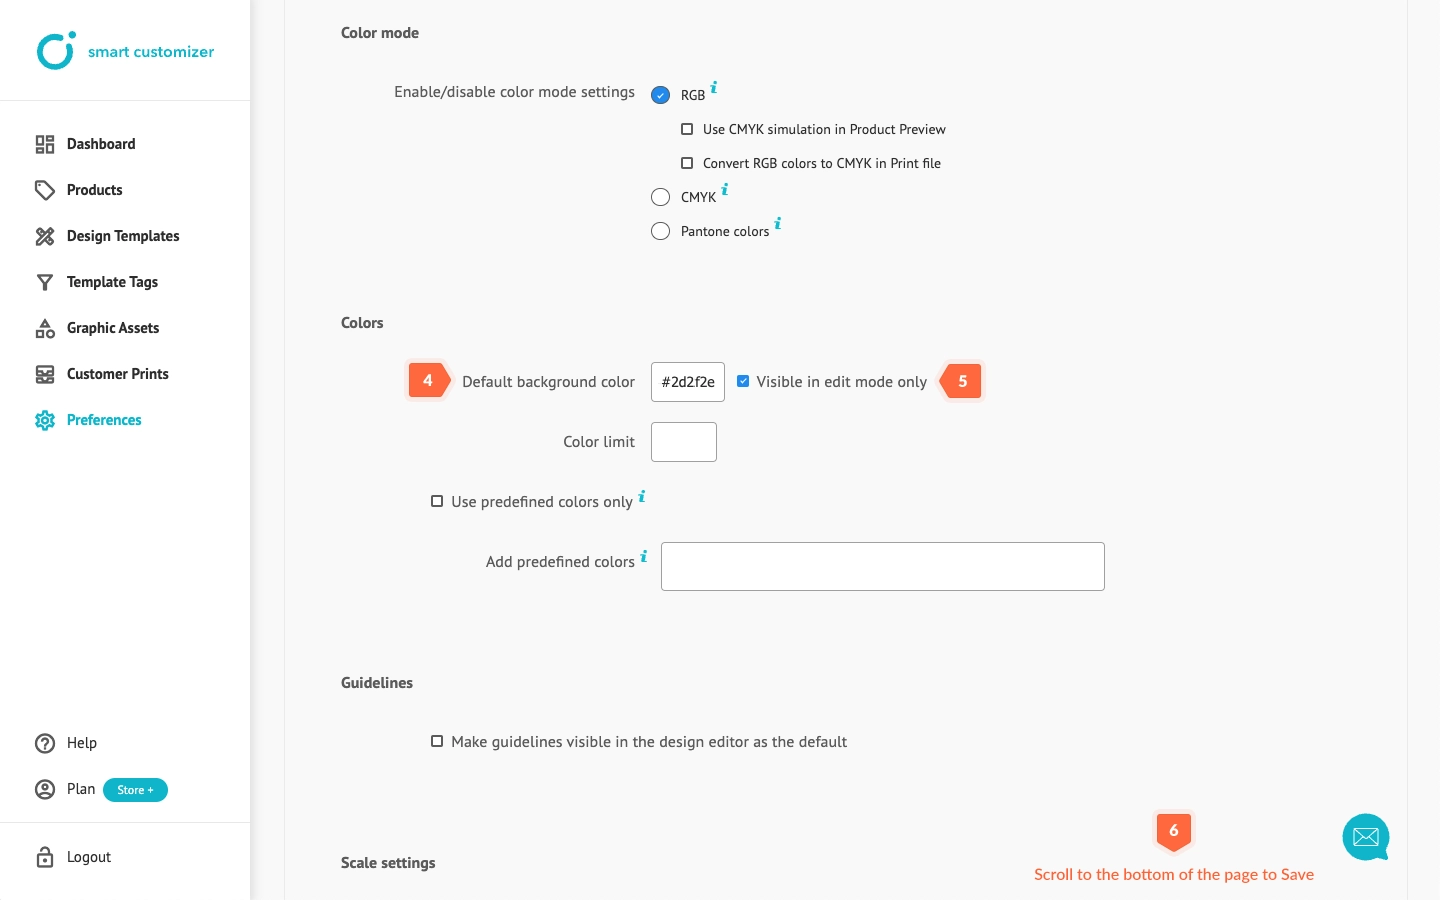
You can set an additional non-mandatory Toolset to enhance your user experience. In this instance, the product is dark gray, and it would be beneficial for the editor's window background to match. To achieve this:
- Go to Preferences.
- Click Add new toolset.
- Change Tooset title.
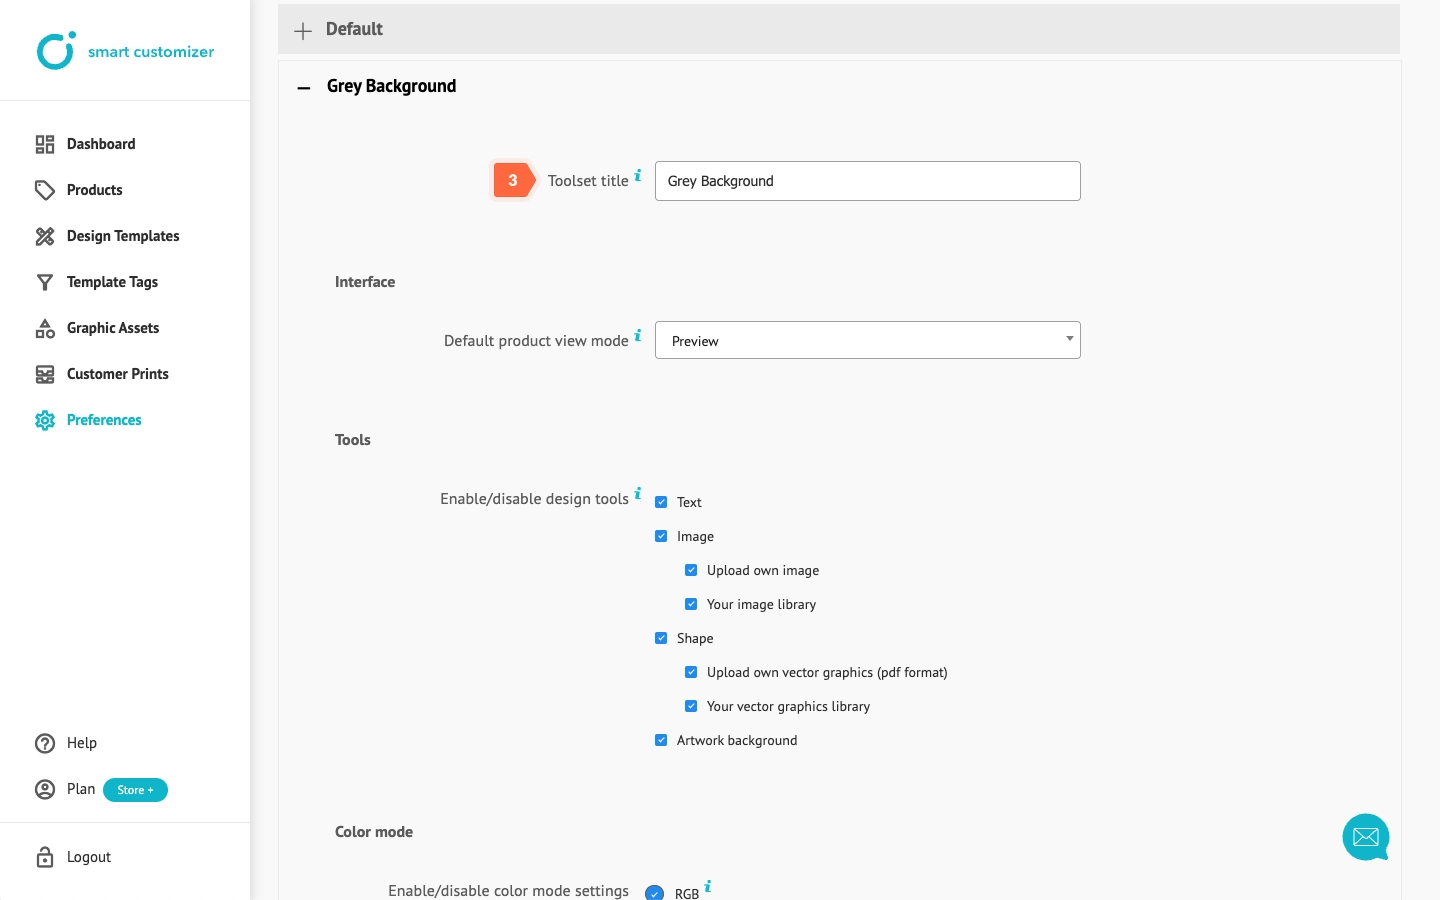
- Enter your color HEX code in Default background color input.
- Check Visible in edit mode only.
- Scroll down and Save it.
- Go back to your Product.
- In Toolset section choose your created toolset.
- Save the changes.
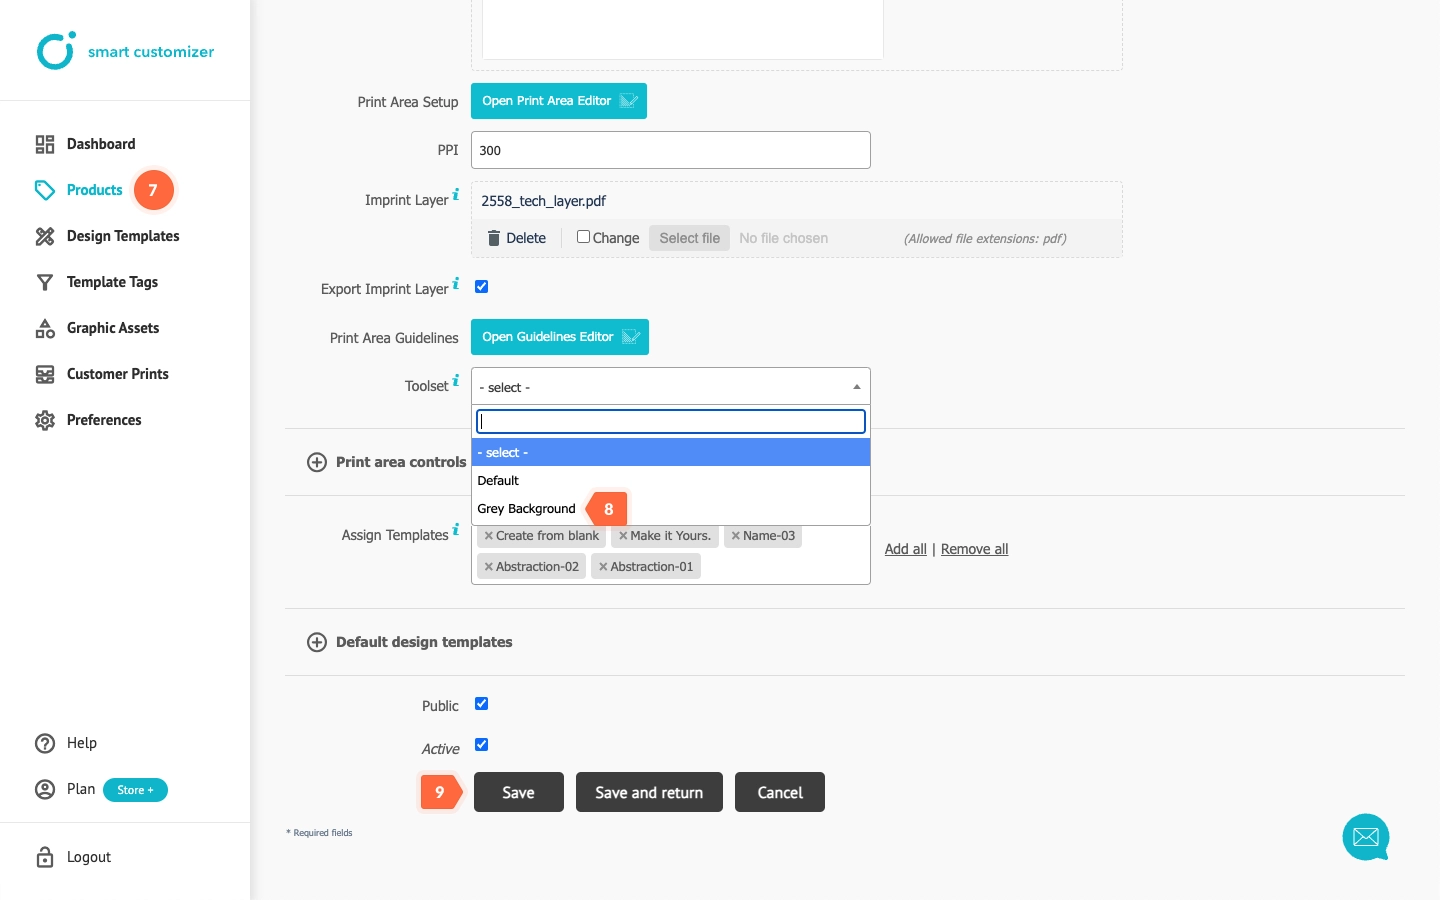
The result:
Tips & Tricks
To elevate your user experience, consider using a 3D model of your product, enabling customers to view it from every angle. Simply follow our guidelines:
If you have any questions or need assistance with 3D products, please feel free to reach out to our Support Team.
