On this page
How to setup your Shopify store for customization business: step by step guide
A customizable product business is a very attractive and rewarding business concept. It involves customers themselves in the design process and makes any item you sell - unique and of high emotional value to the one buying.
But the technicality of such business often becomes the main complication stopping personalization enthusiasts from starting. It’s pretty clear how you sell products online from images. But how do you make those images/products editable on your e-shop, create realistic /live previews, and similar?
2D/3D product models, graphic formats, and software make it a dark forest that’s scary to set foot in. That’s why I thought why not share the details of how this part actually works?
So if you’re at the research stage of what you need to do to launch a customizable product business, we’ll try to cover all the key things for you to be as prepared as possible. Let’s take it step-by-step.
01 Creating an online store
Not going to surprise you yet - you need a working store, if you already own a Shopify shop, you can skip to the 3rd step, but if you’re at stage 0 this is important.
What most entrepreneurs don’t take into account, is that creating an e-shop is not only creating your account, choosing some kind of template, and filling it out. It takes some time-consuming tasks such as preparing product descriptions, categorizing, taking and editing product photos, and if you want to change something not according to the template then you will even need some coding. After you launch, it will also be an ongoing job to maintain the eshop - update, clean, optimize, and make sure it’s always working.
My goal is not to make you discouraged, but to prepare you for what’s coming. If you decide to launch a Shopify store by yourself or with a small team, you’re going to need to figure some things out on your own, by watching tutorials and reading those knowledge guides. Brands do put effort into them - so use it!
Now we can dive into the technicality of a customizable product e-shop. Let’s go!
02 Pick a template / Shopify theme
Once you create your Shopify store, you want to jump to thinking about how it should look - imagine the colors, the layout, and a big fat logo at the top? Well, when thinking about a customization business, there is one additional thing.
Shopify has a big library of free and paid themes that will determine the feel and look of your shop, but some of them are very old in terms of the way they’re coded. And others - even though modern looking, are not compatible with some plugins or won’t have the functionality needed for a customization business.
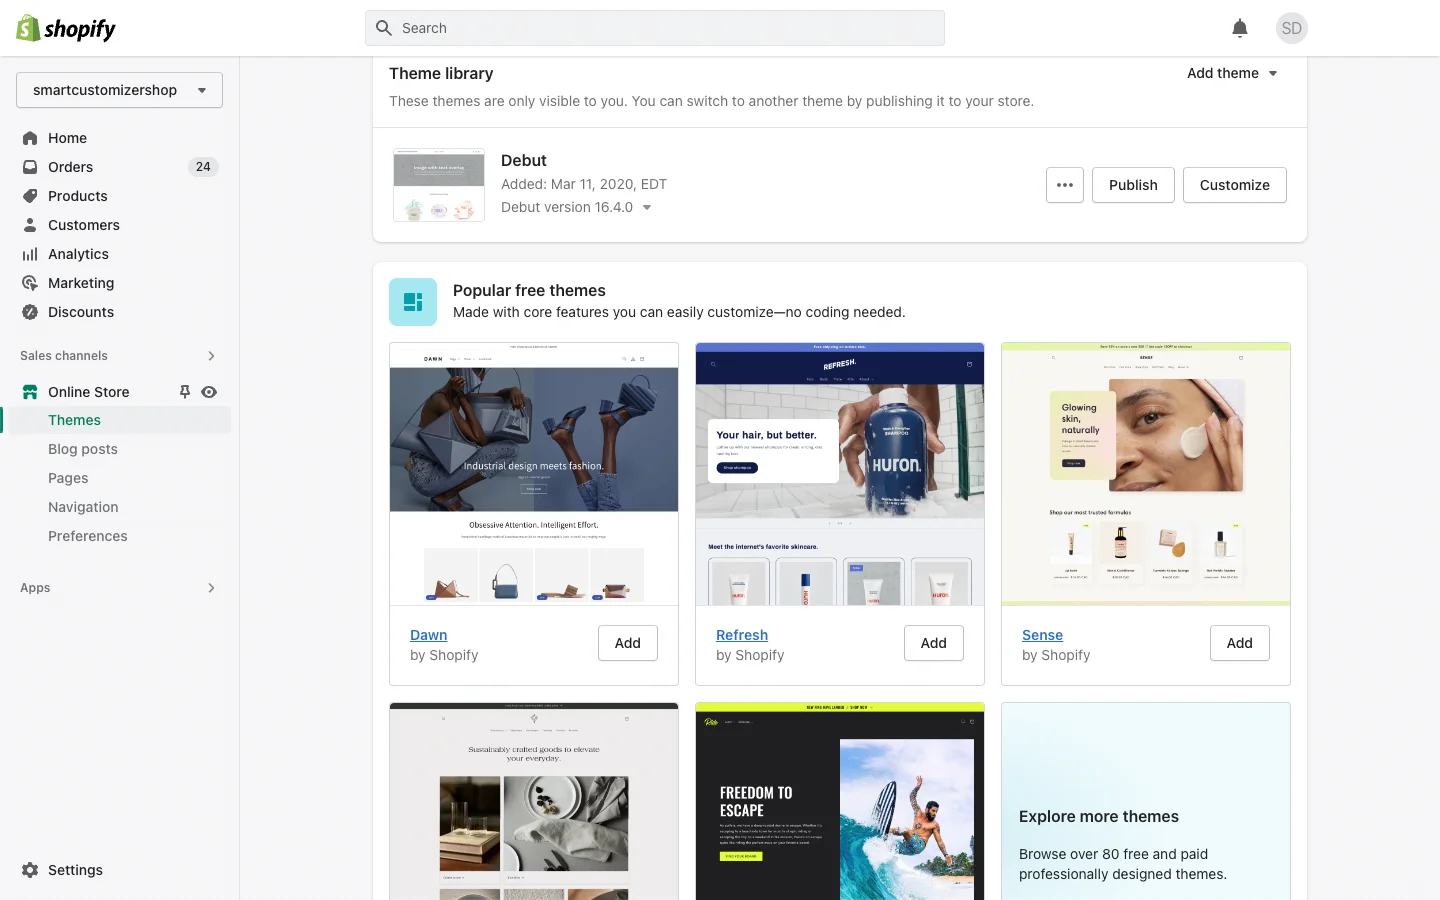
It is important for you because if you choose a bad theme the plugin may have errors that will ruin your user experience, making customers quit midway through product customization.
The safe way to go would be to choose from free themes created by Shopify. They should be most up-to-date and compatible with all the apps from the app store. But still, don’t forget to read reviews about the theme as you can get to know a lot of details about how easy it was to edit if it has any bugs or complicated parts, and similar.
If you grow a successful business, you can always come back, and invest in the shop design by buying a theme and updating your website.
03 Choose and install a plugin
Choosing the app or plugin for your customization business is a very critical step, so do your research here well. Open the Shopify app store and look for product customization apps.
Pick your favorites and read all about them. Go to their website, and look for use cases. Many of them provide at least a few client shops that have their app installed. Visit them and test all the customization journey - usually, it starts on their product page.
Find a button that says “customize product” or similar and check such things as:
- How long does it take for the product images to load?
- Does the customization screen or “editor” look modern?
- Is it interactive? Some tools only let you add your own text to the product and call that customization.
- Is it easy to navigate and make changes?
- Does it have a real-time preview? Meaning that changes appear on the product image instantly.
- Do they have design templates? To make it easy for you as a user to start somewhere?
- Can you add your customized product to the shopping cart?
- Can the user edit the design added to the shopping cart?
- Does it sync to the shopping cart well?
- How it fits workflow (is it easy to get print-ready files), does print files meet your manufacturing requirements?
- How it works on mobile (a large part of customers use mobiles for shopping)
Your goal is to check their performance and think if it fits YOUR product customization needs. It seems there are countless apps in the market, however, some are quite old and don’t meet the standards of modern software.
Once you find one suiting your liking - install it and start your trial. During this time get to know how the tool performs from the inside. If it’s easy for you to navigate, find orders, and manage them, check what kind of setting they have and move to the next step.
04 Create your first product
Now the fun part begins. According to the growth-driven development principle, you should start small. Create 1 fully customizable product in your store. It is for you to learn how the customizable product setup works.
So pick a product from your assortment, that is not too complex, but has a lot of customization potential and add it to your app. It should be something people like to personalize and buy.
You could go through older client inquiries - maybe you had repeating questions about certain products and if you could accept custom requests for them. Or just trust your intuition. Your customization business may have a more complicated launch simply because your first customizable product offering is not attractive to clients.
Then invest time in preparing product information that would convey value and encourage visitors to buy. Fill in all the details: clear product title, appealing description, emphasize how your personalized product will bring out the individuality in each person and create the feeling of uniqueness.
Add technical details that build trust. Communicate all about fabrics, materials, expertise, and quality of production. For example, you’re using very high-quality paint that is safe for children? It’s an important benefit, so don’t skip it!
Lastly, try to include realistic examples. Add pictures of completed orders or if you don’t have any, you can use free mockups and create some. You need to induce imagination so customers would create a vision of how their personalized product would look and feel like.
Yet if you really don’t have the resources to prepare visual examples of your customized product, don’t forget to add them later. Take pictures straight after production and create an inspiring portfolio. Trust me - it works like a charm.
After you prepare your product information we can dive deeper into more technical next steps.
05 Graphic assets for product customization
One of the most important pieces of a customization business online is product visualization, so the preparation of your graphic assets can make or break the customization experience.
Each app or plugin on the Shopify app store will have a set of recommendations about how to prepare product images and graphics for the best visualization quality possible, so make sure to find and follow them.
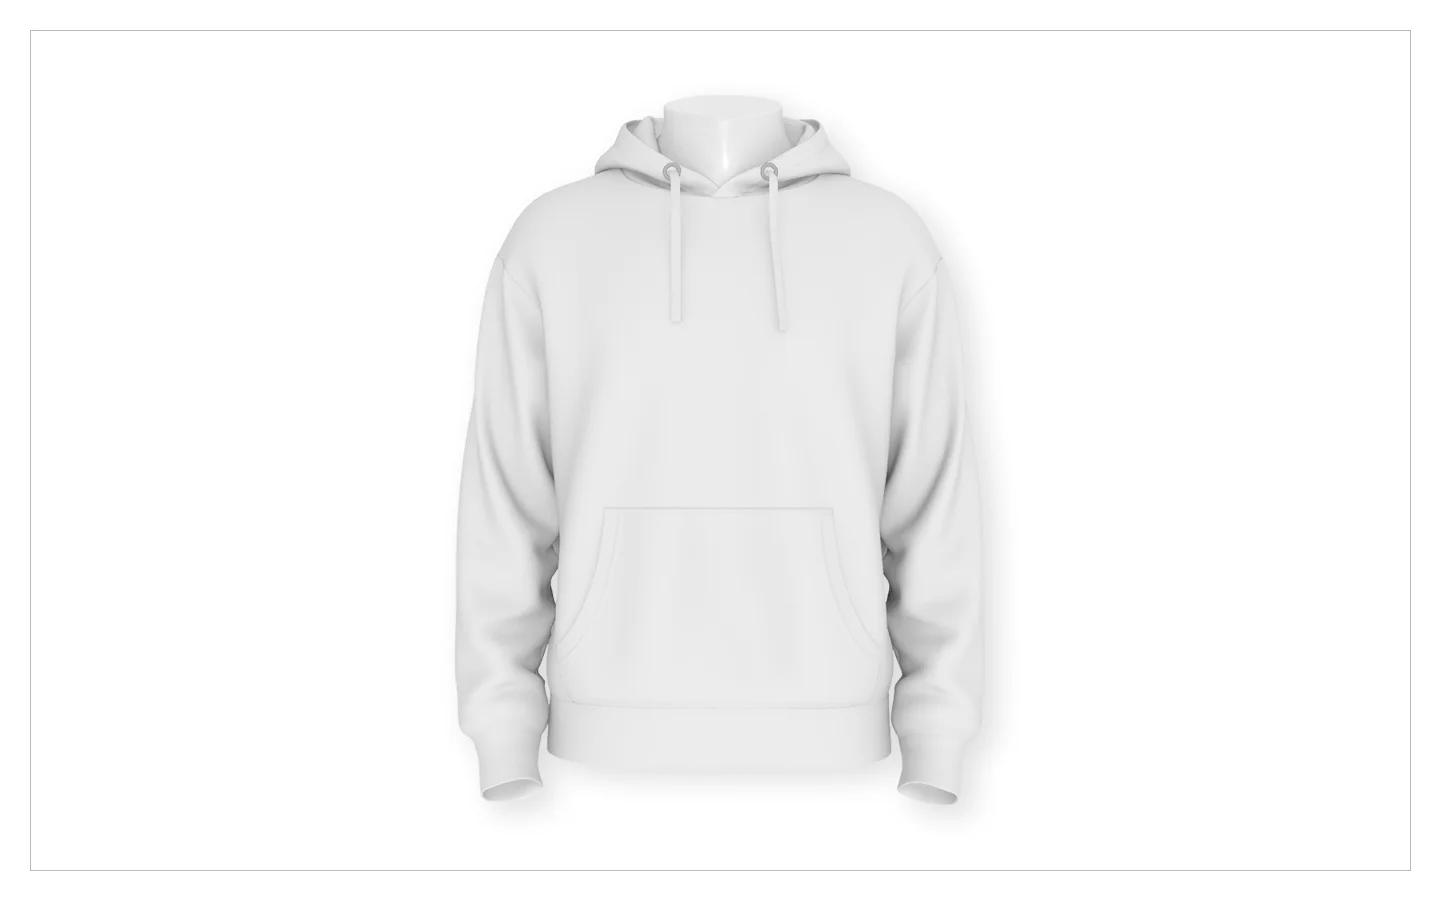
First and foremost, you will need high-quality product images with white backgrounds. It guarantees the best view for product customization without noise and easier product setup.
Secondly, you will need additional graphic assets that will help users start the product customization. Even if it may seem that giving endless design possibilities to your customers seems like being “the good guy”, in many cases - makes customers quit the customization process. Sometimes we just lack inspiration when looking at a blank paper, right?
That’s why providing design templates is important. You can create them yourself using the customization editor on the app itself and the basic vector assets provided. Also, you should be able to upload and use your own high-resolution images or vector graphics so your design templates would resonate with your target audience even more.
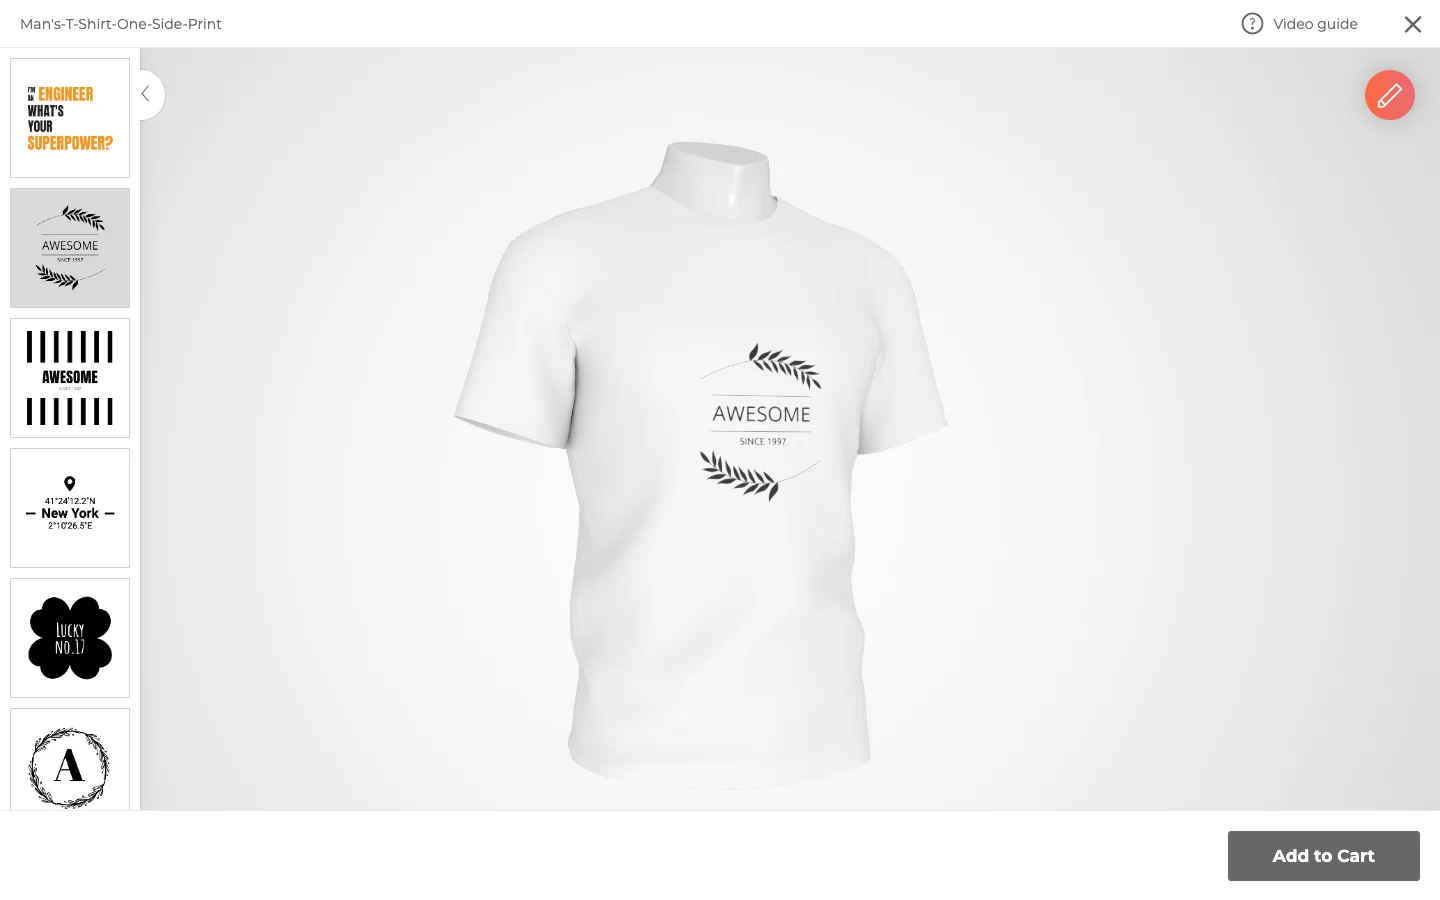
In this case, it’s really beneficial if the tool of your choice can offer a design template library for you to use, so don’t forget to check that when picking your customization tool.
06 How to set up customization for your product and link to Shopify?
Now let’s look into the full setup sequence. The level of complexity here really depends on the app you choose and your experience with software tools but that’s why an intuitive interface is also an important choice criterion.
So the whole process should consist of 5 steps:
Product installation
It includes choosing your Shopify product in the app, uploading product images, setting preview type, whether it’s 2D or 3D, assigning names and preparing the basic info.
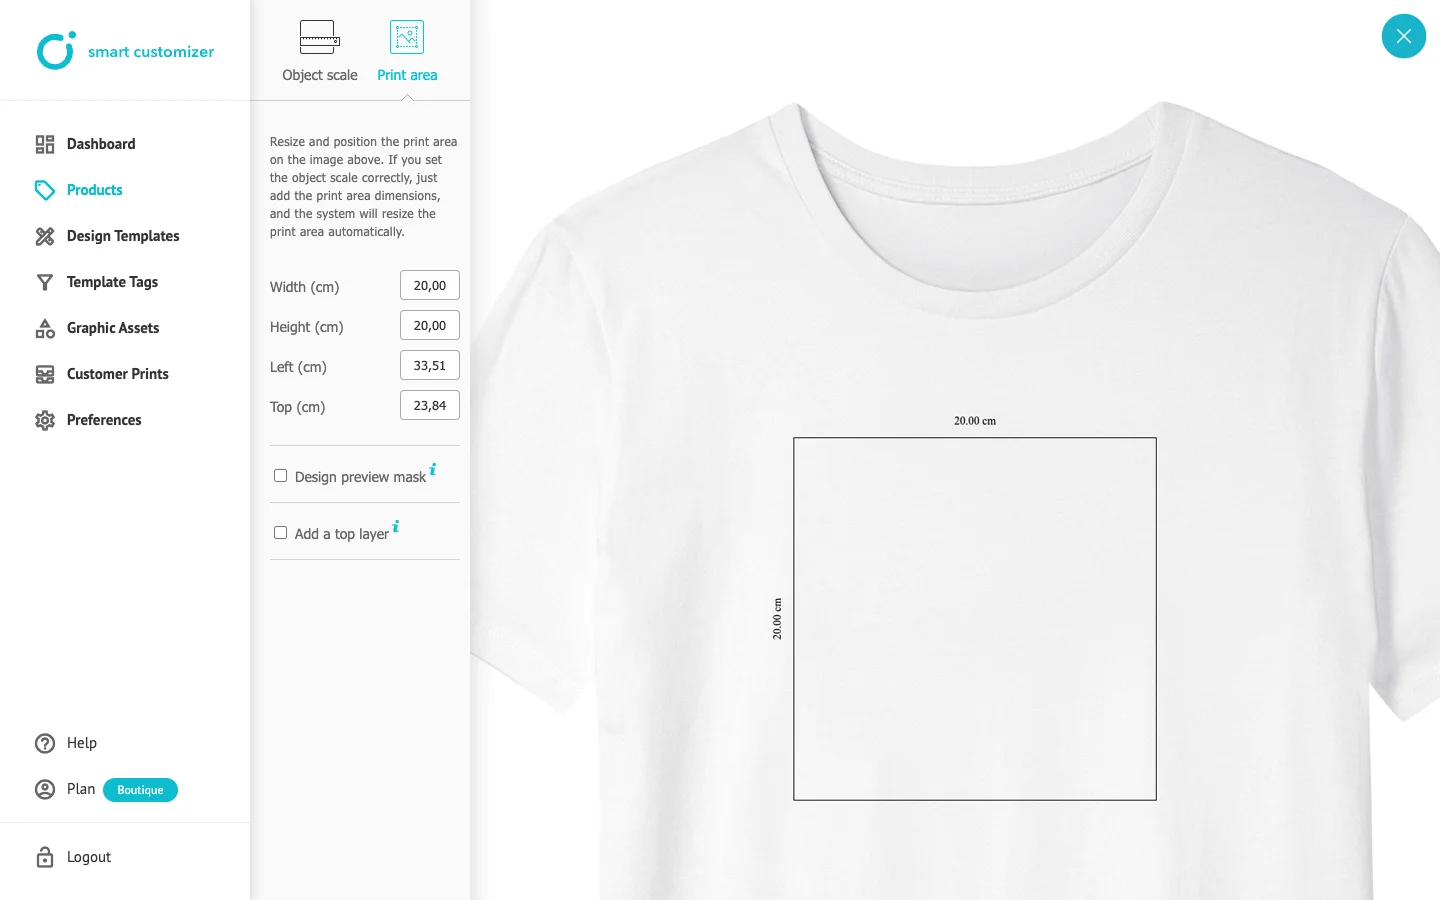
Setting up the print (or customization) area for the product
In this stage, you define the real-world scale of your object and set up the area which will be customizable for your product.
You simply input the measurements of the physical product so the print files with custom designs would meet your production standards.
After that, you set the size and position of the customization area. Depending on the product, it could be only a small block in the middle of the t-shirt or you might want to enable adding patterns for the whole product body.
Creating the guidelines or rules for product customization
Guidelines and rules are for your customers on the other side of the screen. It simplifies the experience for first-time users and makes the customization process fun instead of frustrating.
Here are a few rules that can be found and set on Smart Customizer:
- guidelines - Informational layer, helping users understand what can be done and what cannot. Example: you don’t allow users to place text next to the edge of the design, because it will bend or be cut off in the final product.
- define DPI - if users will be able to upload their photos to the design, this indicator will add a warning if their uploaded graphics are too small and will be printed with poor quality.
- Color limitation and predefined palettes - this will not let users create designs that could not be implemented with your production equipment.
- add imprints - if you want to have important elements on all of your product designs such as certain product compositions, copyright info, or logo, you can use an imprint layer that will be pressed on top.
- adding multiple print areas - if you want to allow users to customize multiple zones on the product for eg: two sides of a badge, or the front and back of a t-shirt.
Even though all of these are optional to set, they lower the possibility of errors through the production flow and ensure that customer orders can be moved straight to production.
Remember, that if you’re only a beginner in the product customization field, it’s only natural that you may have some mistakes with the first prints. However, these tools allow you to quickly learn and adjust the system to your production preferences, so they never happen twice.
Publishing products in your store
After you’re done with all the setup steps, you will have to link your Shopify product to the right customization options. In other words, you tell the tool which product should have customization enabled and what functionality it will allow. You save your product and publish and the customizable product should automatically appear in your online catalog. Check out how it’s done on Smart Customizer in our knowledge base.
Set pricing
Customizable product pricing is different from other regular products, so this is a very important part for you to plan out.
First, you need to figure out if or how much personalization will increase your production costs and then adjust the selling price for such products.
A most popular model to calculate your customizable product base price. The price of a regular product without any customization + the price of the materials required for customization + customization job (it includes resources, human time, including process management as it lengthens the fulfillment chain) + the profit margin that you set.
You should also take into account that personalized products usually sell for higher profit margins than non-personalized items as consumers are also willing to pay more.
After you decide on the starting price for your customizable product, be open-minded and understand that good pricing also requires some testing. To find the perfect price for your product you should try to sell for a higher and lower price and see how it will affect your sales numbers and then be confident about your decisions.
Testing the whole customization journey
The process is never finished without testing. Only this time the app testing is already happening in your store! So be sharp and go through the customer journey.
- Check the product page - if the customization process is initiated successfully.
- The loading speed - if it’s fast and smooth.
- The VISUALIZATION of your product, if it looks as you imagined.
- Try creating a product design from scratch, try out templates, and try all the scenarios you can think of to ensure it’s working as you expected.
- Test out product preview with your designs.
- Add the product to the cart to see if it syncs.
- Try to purchase the product.
- Check the generated print files.
- And lastly, check the order through the admin view. If you can see the order, what happens if you cancel or complete it?
Then you have a chance to fix all minor tweaks and start selling! It would be great for you to complete a few orders with real clients to check all the production flow, see if your pricing is reasonable, etc. That way you save effort and make sure things work before scaling. After that, you may start adding more customizable products to your Shopify store-expanding product catalog.
Final words
Launching a customization business is going to take time, but setting up customizable products with Shopify apps will not require you to learn any coding. Just to use the software and anyone can do it.
So our advice is simple:
- Invest time in choosing the plugin.
- Don’t quit midway, learn the part you don’t understand.
- Contact customer support when needed.
- Don’t expect it to take 30 mins to set up everything.
- Don’t believe those who make such promises.
And START. The customization business has so much potential as all of us are sentimental and love the feeling of uniqueness, even when we’re talking about cups, t-shirts, or phone cases.
