Adding a new product in Stand-Alone (3D)
About Stand-Alone products
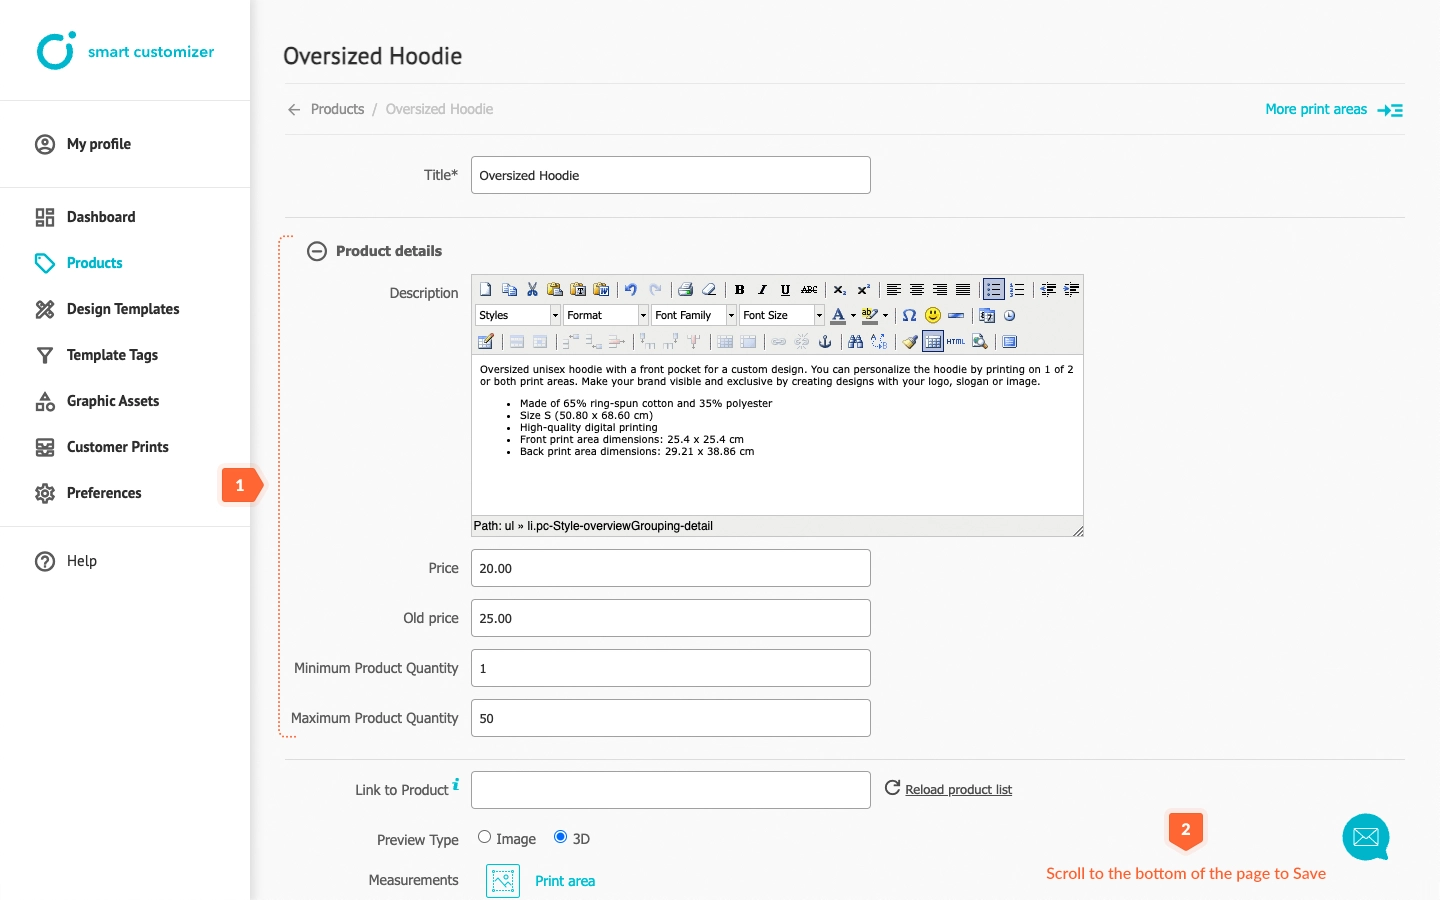
- Stand-Alone products differ from those on Shopify/WooCommerce in that they aren't linked to any store settings responsible for managing details like price and quantity information.
- These product details can be adjusted within the options available for Stand-Alone products and will be visible in the order form once customization is completed.
- Here is an example of how to create a new customizable 3D product template from scratch and make a URL for it.
Adding a new product
- Go to Products.
- Click Add new product.
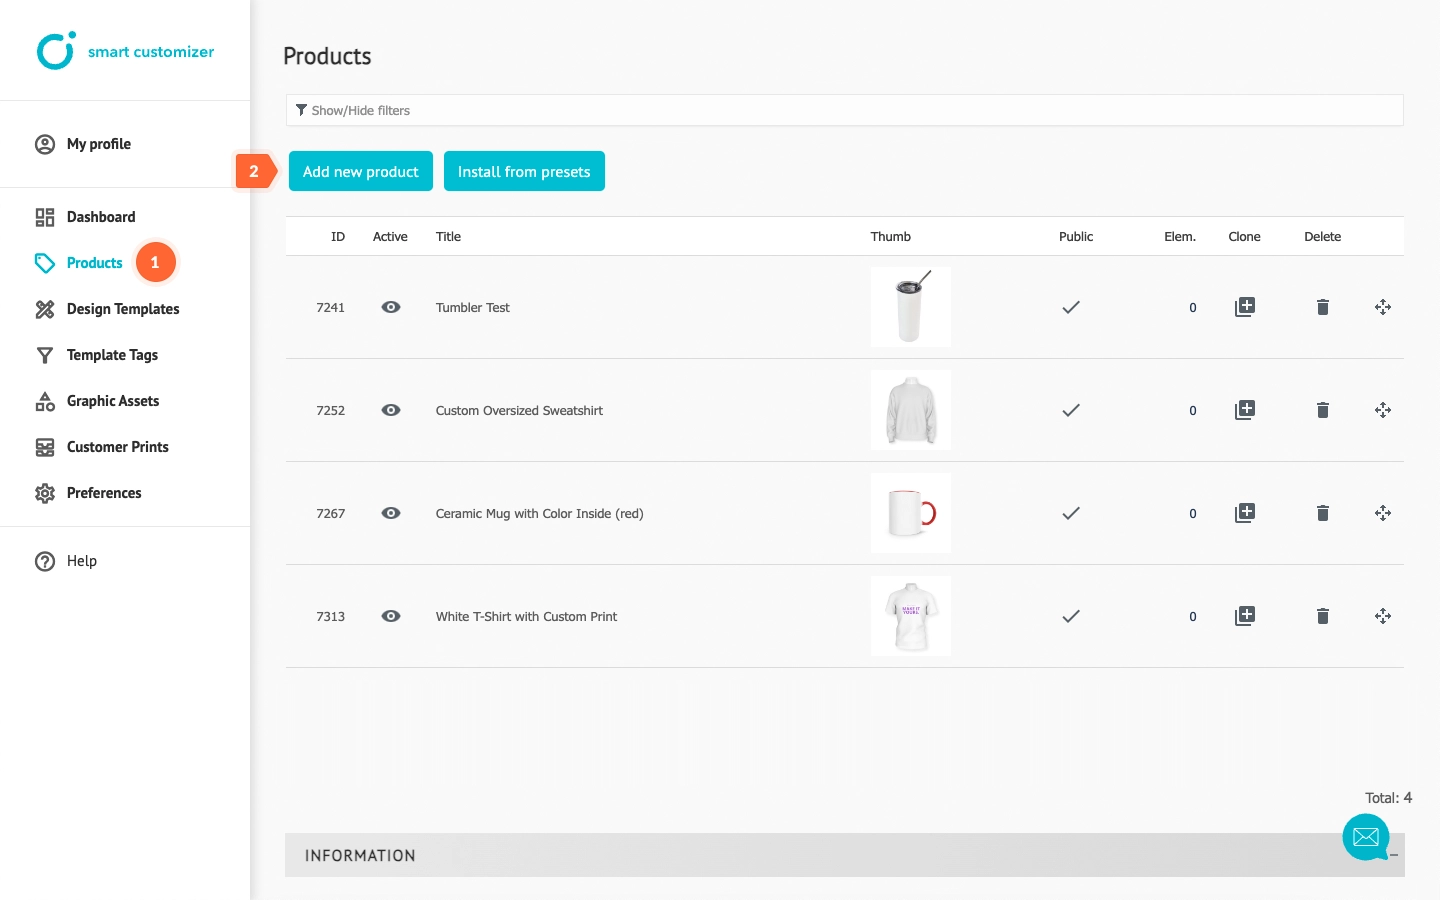
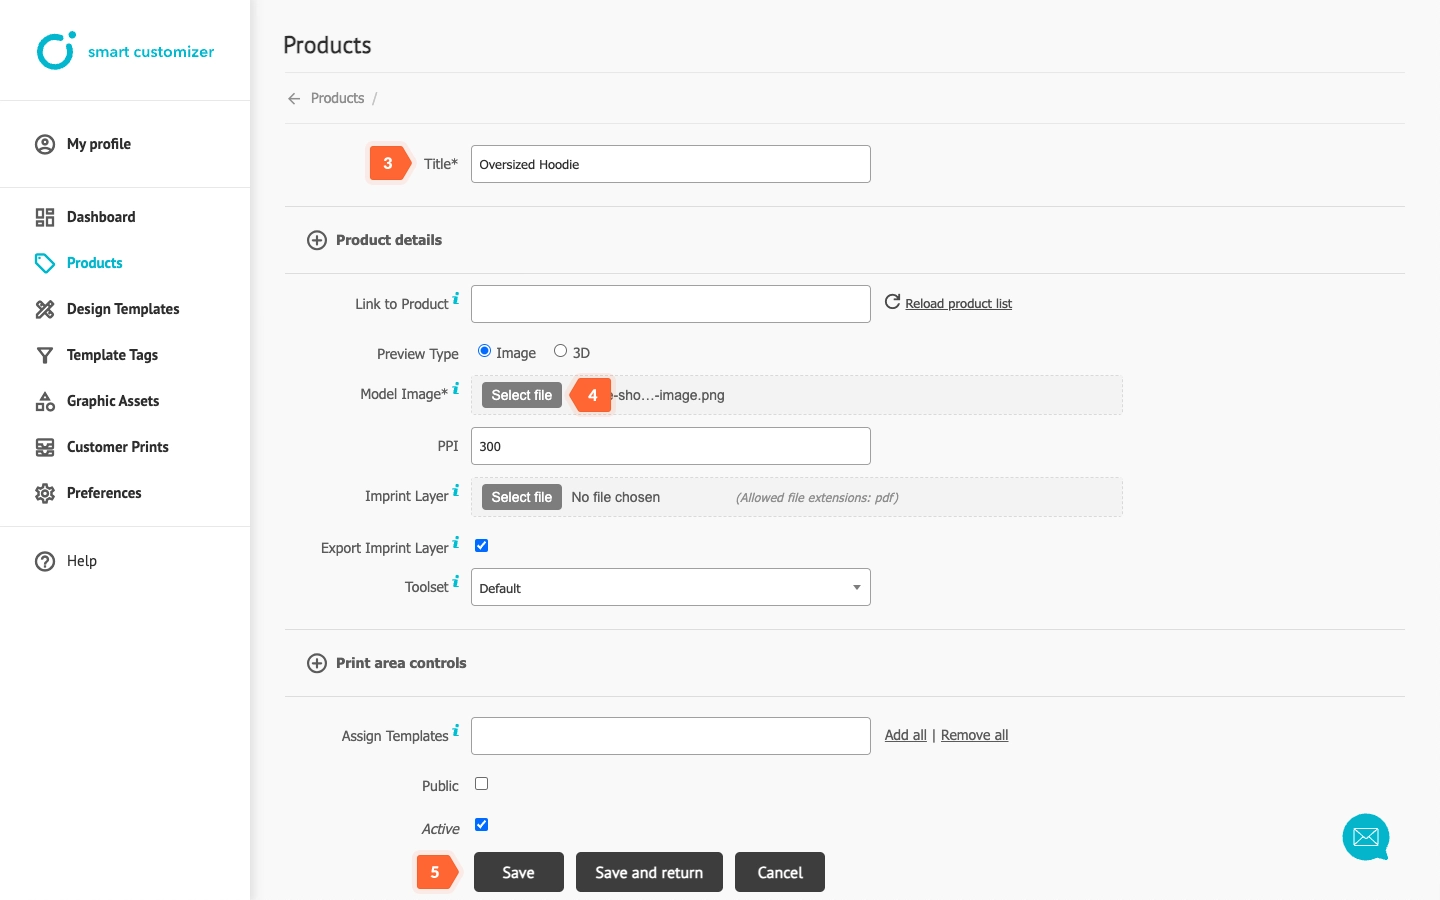
- Enter Title.
- Click Select file to upload Model image. This image will be displayed on the URL's page as the product representation.
- Save the changes.
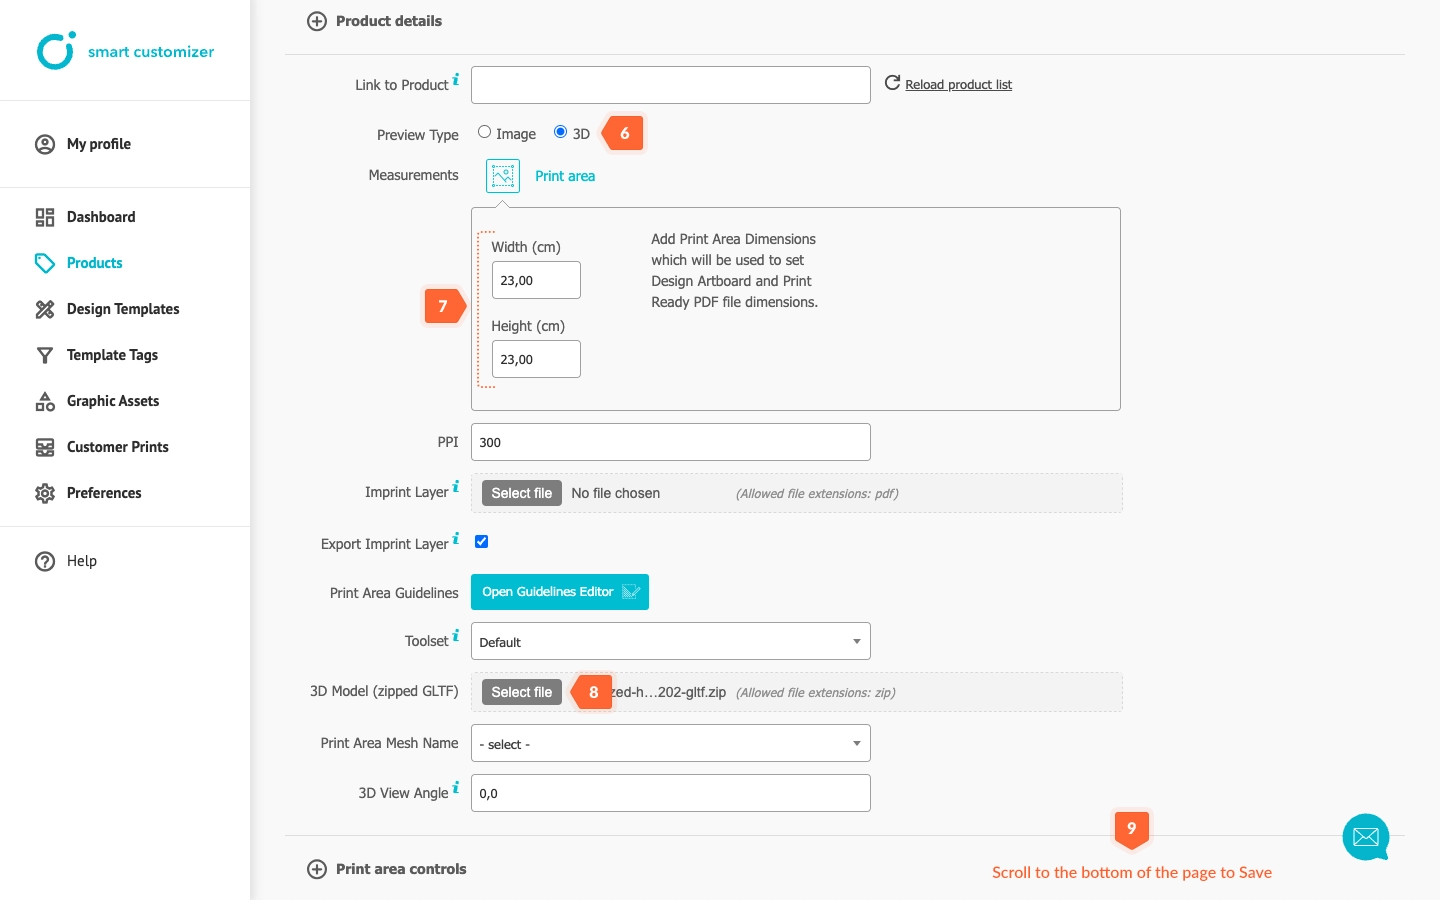
- Select 3D Preview Type.
- Enter the Print Area Measurements. They should match those of the 3D model or be in scale with it.
- Click Select file to upload your 3D model (zipped glTF). Ensure it has been prepared according to our requirements beforehand.
- Scroll down to Save changes.
- Choose Print Area Mesh Name that is your print layer.
- Assign Design templates to simplify customization for customers.
- Mark Public and Active checkboxes and Save the changes.
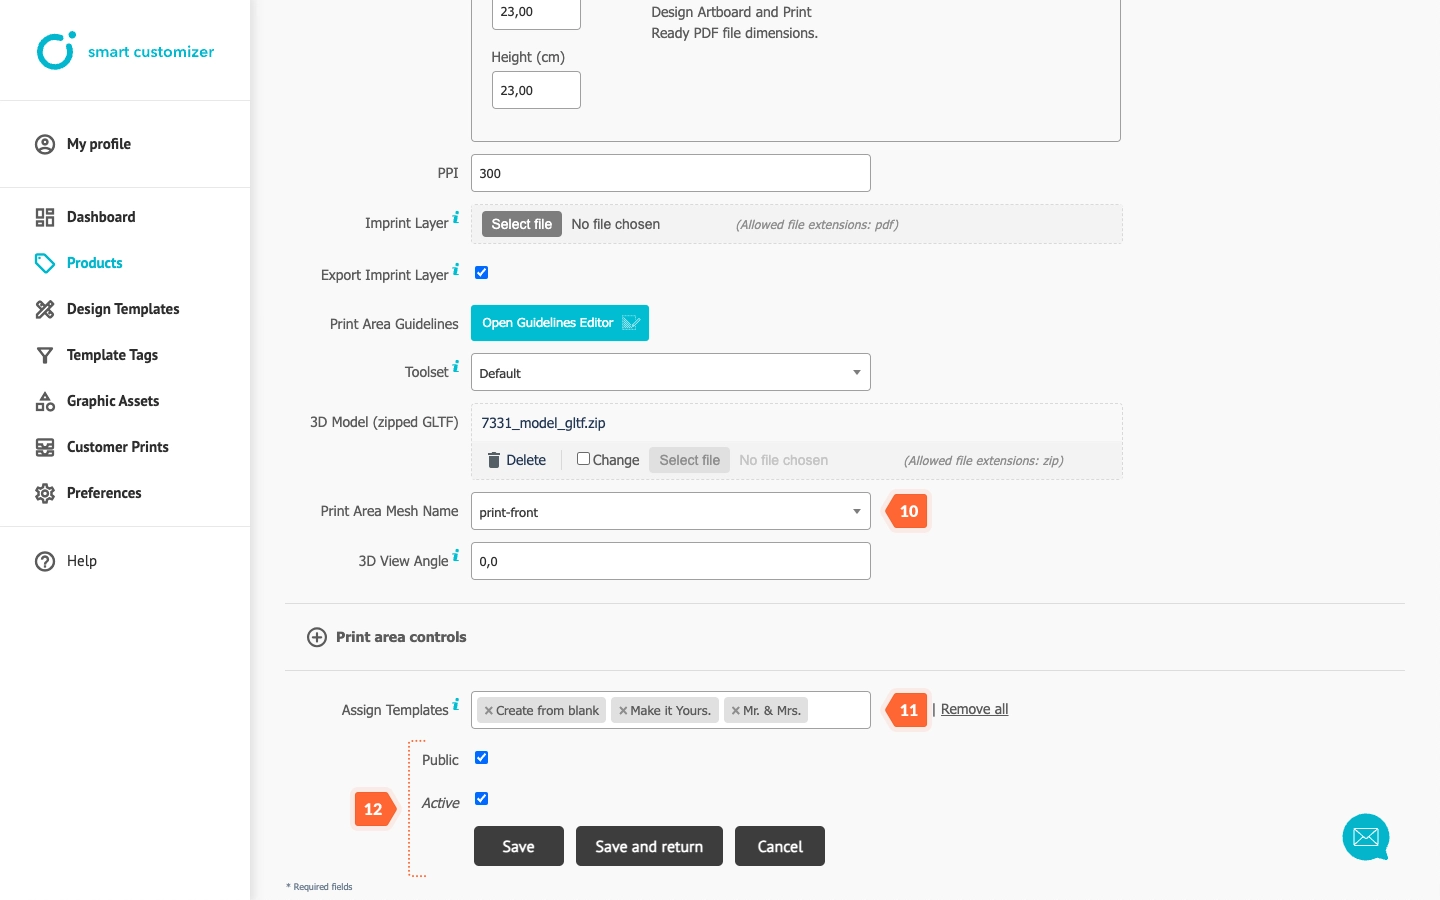
If you want to add a second print area and set a 3D view angle for it, please refer to our guides: Second print area (from point 11) and 3D view angles.
Product details
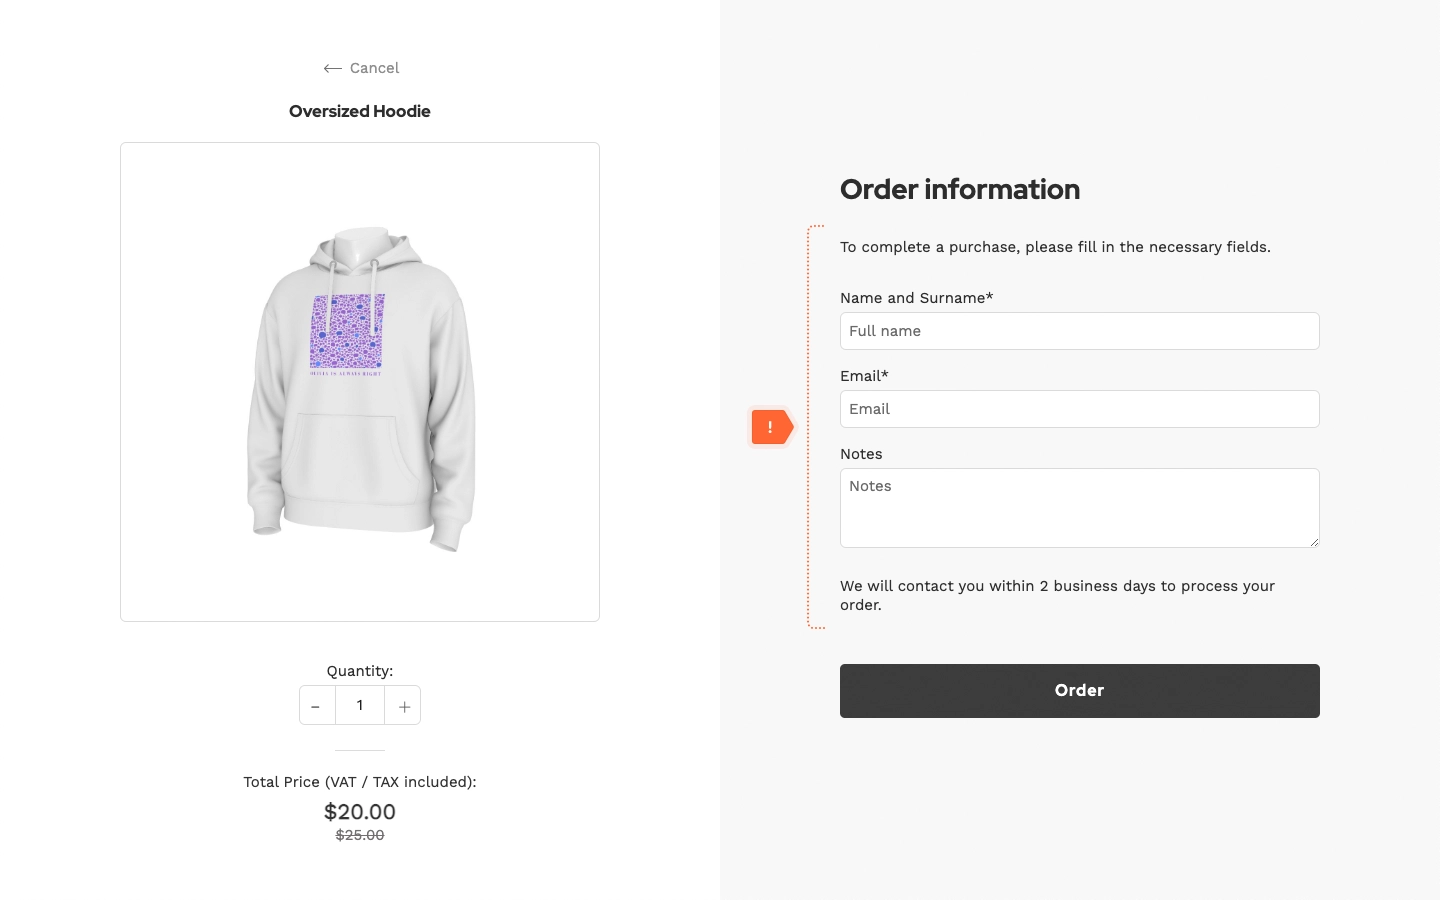
Product details will be shown in the Product Order form window.
Creating a customizable product URL
Before creating a customizable product URL, ensure that you have the following:
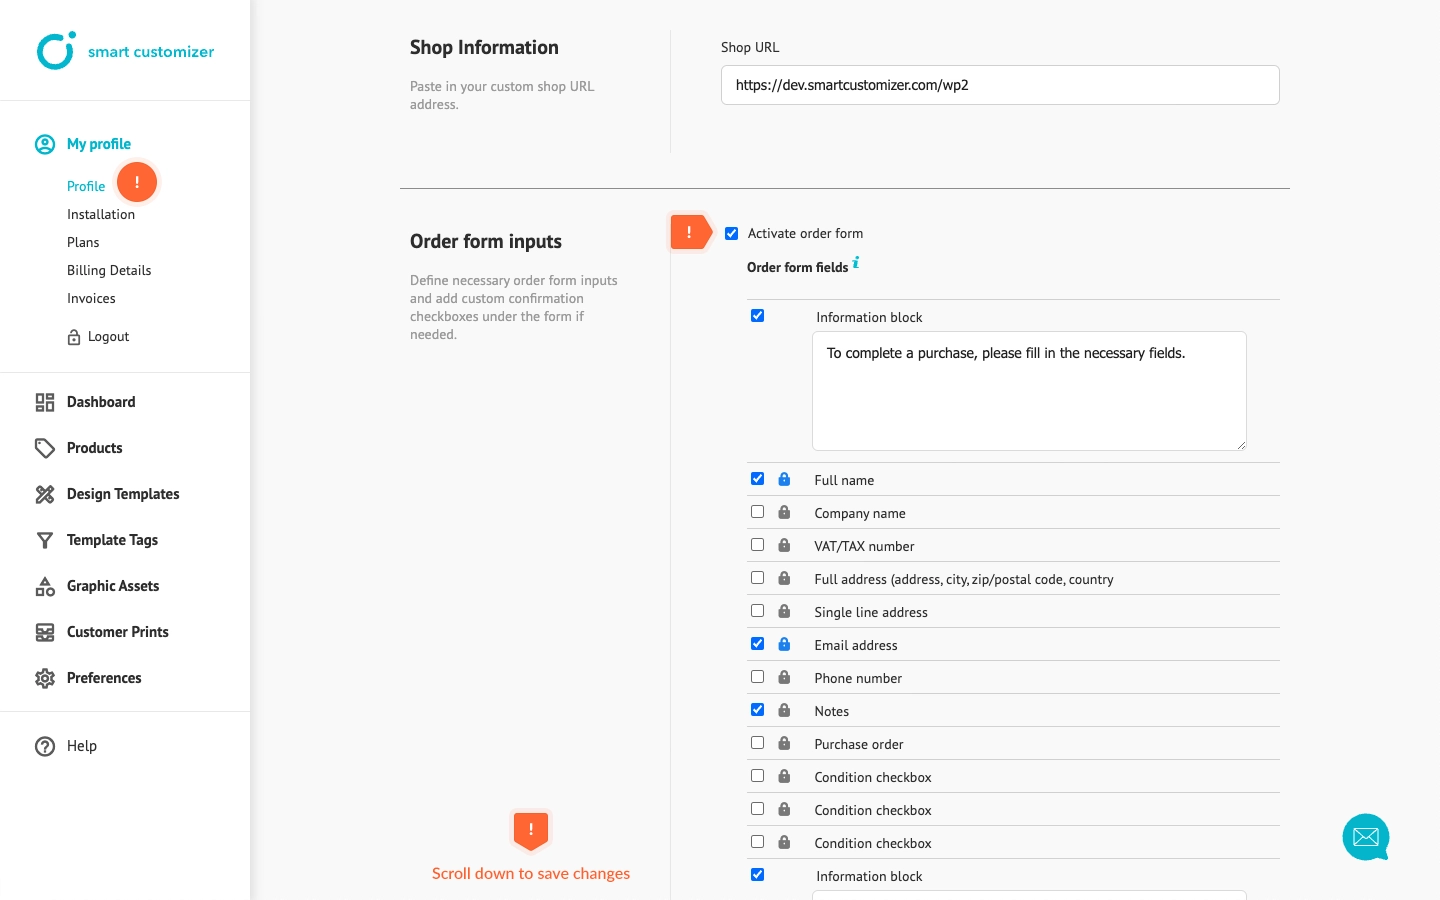
- An active Order form. Make sure your order form is activated and customized according to your requirements. Navigate to Profile > check Activate Order Form, and then Save the changes. Learn more about order form settings here.
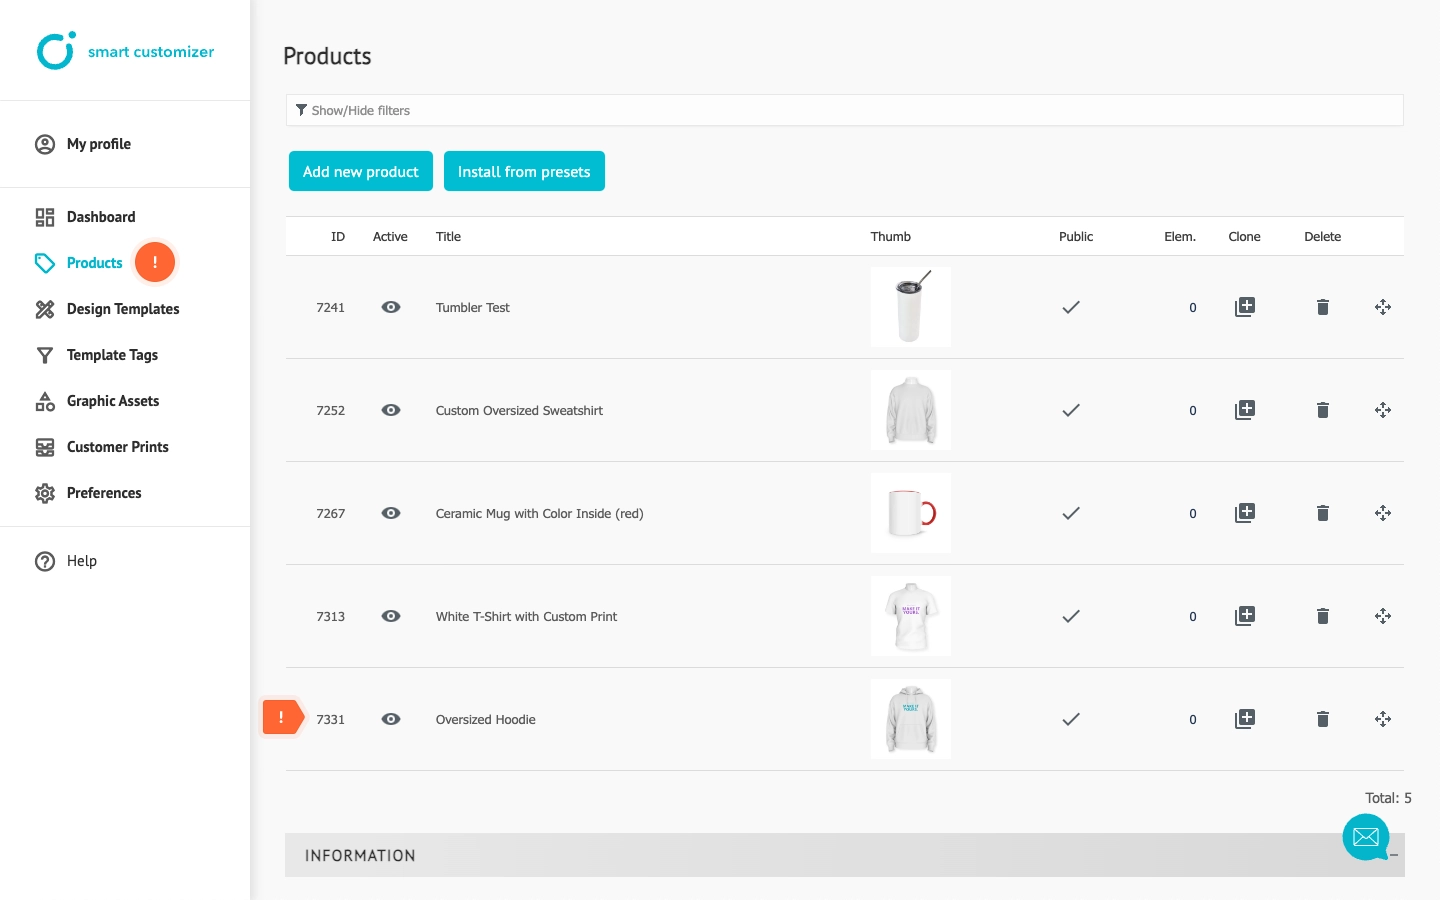
- Mandatory mid parameter - your Product ID. Go to your Products > copy Product ID of the product you wish to create a URL for. Save this ID for reference.
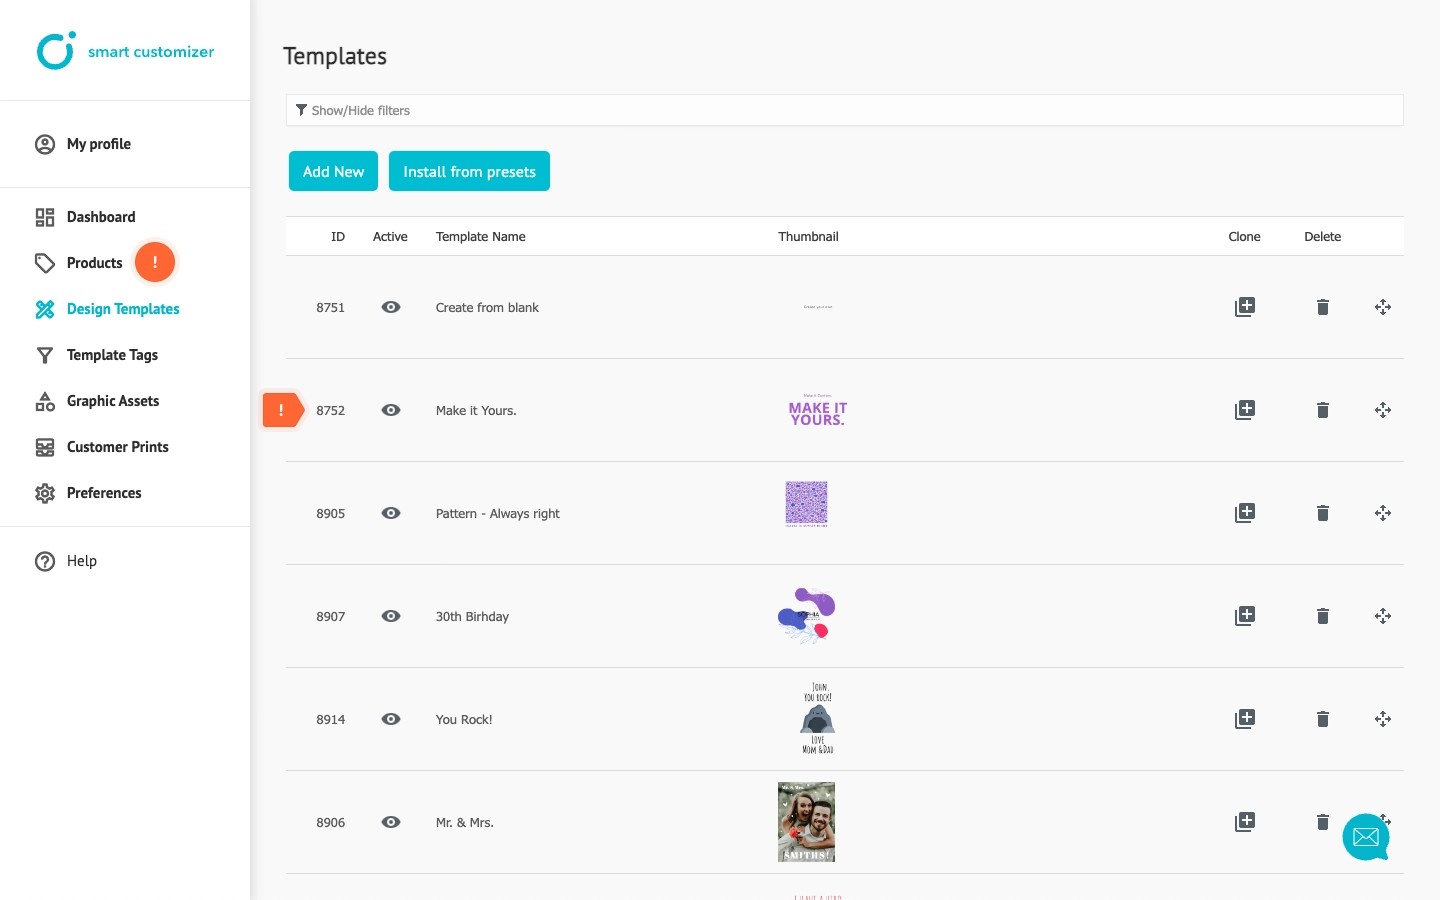
- Optional tid parameter - Design Template ID: If you want your product to have a default template when opened, you will need to know the Design Template ID. Locate and copy this ID to save it for later use.
Once you have all the required details, you can start making a customizable product URL.
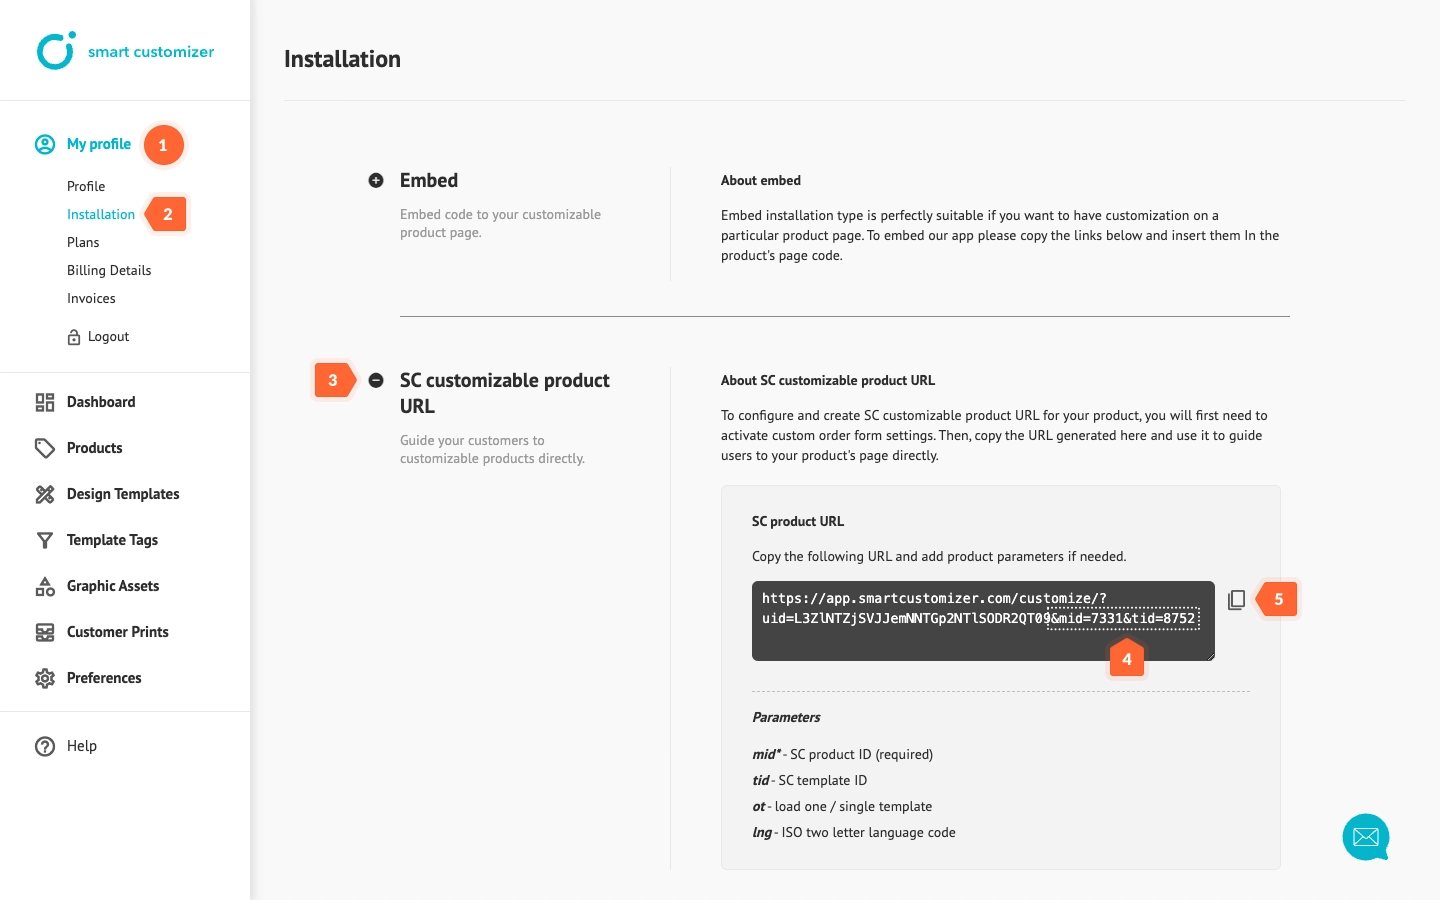
- Click My profile.
- Select Installation.
- Choose SC customizable product URL.
- Update the mid (Product ID) and tid (Design template ID) parameters with your product IDs.
- Copy the URL.
- Paste it into your browser's address bar and press Enter.
- Click Customize product to test it.
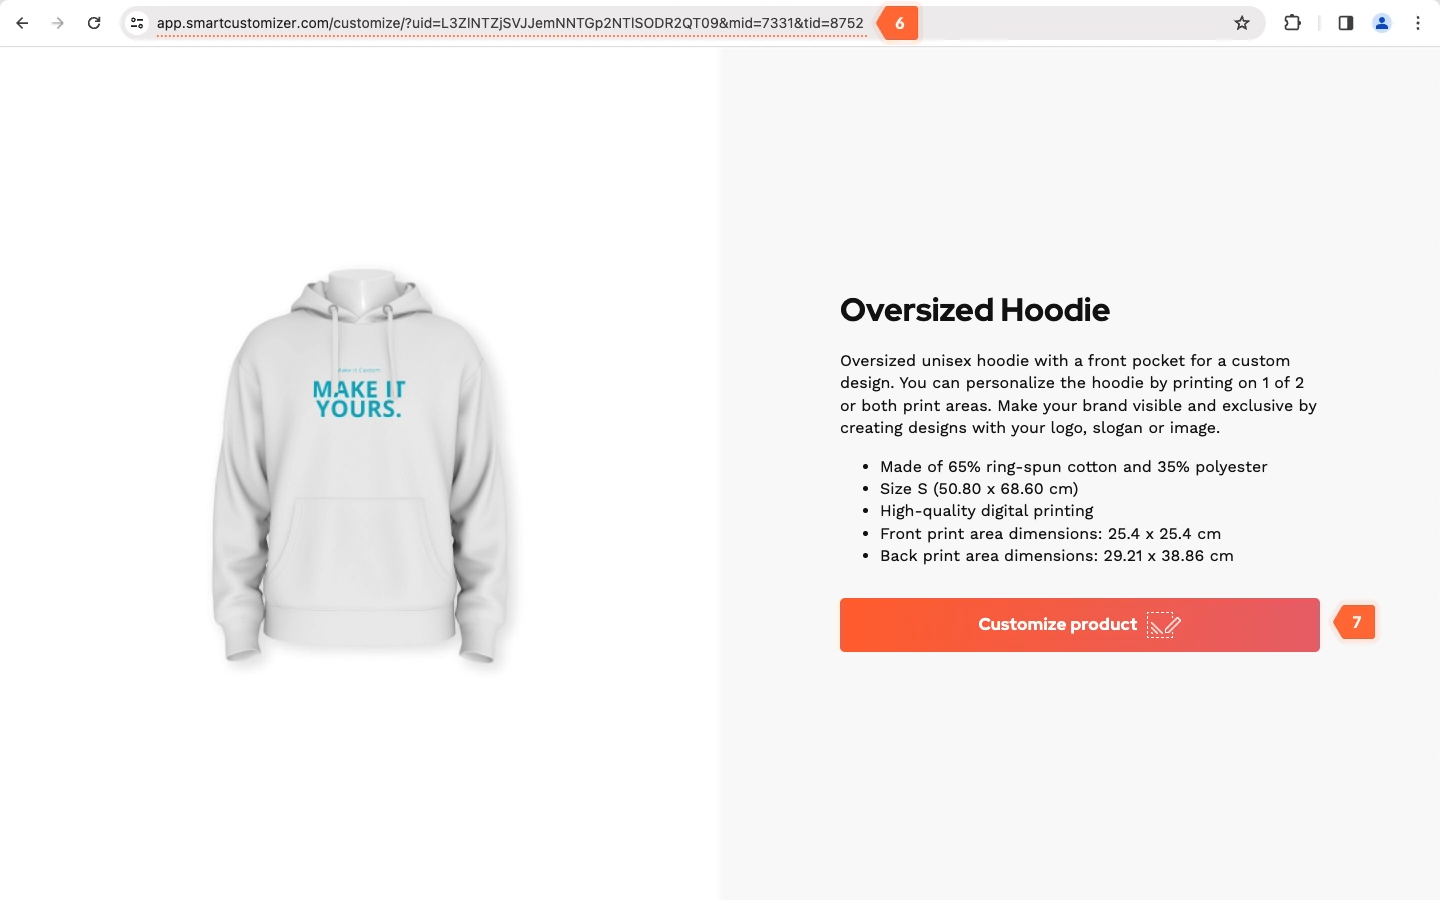
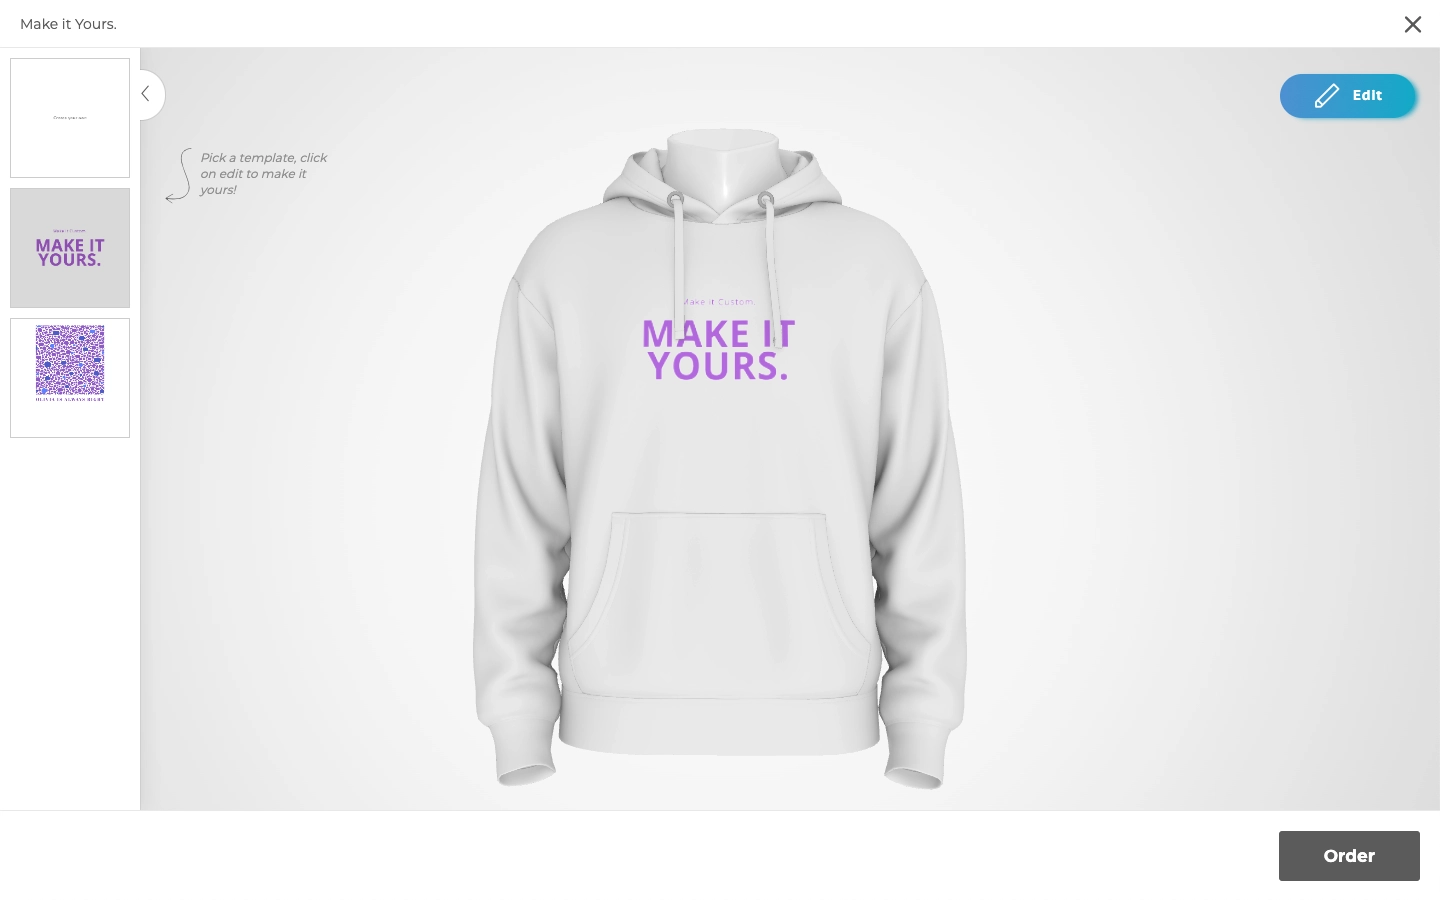
The product will open with the design you've assigned.
When a customer clicks Order, they will be directed to your order form, which they need to fill out to place an order.
Advanced tips
- You can create as many URLs as you need and customize them to suit each of your customers' needs.
- Discover more about additional URL parameters to customize it even more.
- If you have an existing webpage, make your product customizable by embedding a button. Learn more: Stand-Alone: Embedding a product customization button into your web page
